This tutorial will show you to how to setup a synchronization proxy with SyncProxy to enable bidirectional, real time reactive synchronization between your backend database (MySQL, SQL Server, Oracle, MongoDB...) and your offline apps embedding (free open source) SyncProxy client.
You will learn how to setup a powerful synchronization without coding, and how to save yourself hours of hard work, avoiding the use of SDK's, REST API's or complex integrations.
SyncProxy is a proxy server that manages all synchronization between a backend database and offline mobile apps. It connects directly to your SQL/NoSQL database to turn it into a real time reactive datasource.
SyncProxy can be either accessed online or installed on site. This tutorial describes the online use of SyncProxy, but it is also perfectly relevant to a custom installation, simply replace my.syncproxy.com with your own url.
First create an account on https://my.syncproxy.com and complete your profile (this is free and takes only one minute). You can later reuse the same account to create other proxies for different apps. Since you will be the administrator of the proxy, don't forget to check the checkbox "I will manage proxies or groups" and to fill-in your short company info, this will give you access to the admin menu:

Creating a sync proxy is very easy: just click "New proxy" button from the "Proxies" page, then fill-in the database connection settings. Check the connection with "Test connection":
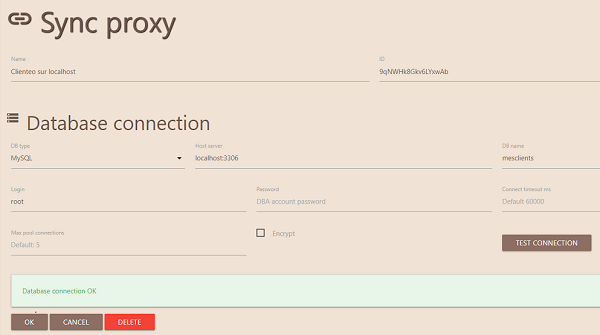
Important: make sure your firewall is set correctly to accept the connection using the listening port of your database server.
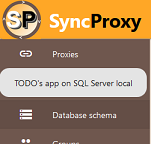
Once your have checked database connection, select the proxy from the list in the admin menu, then click to "Database schema":
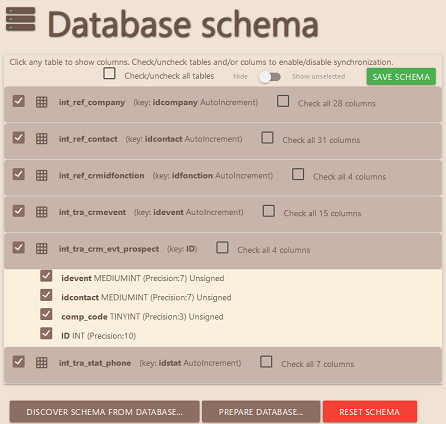
The discovered schema looks like below. Simply select the tables and columns you want to sync, and save your schema once you are done.
If you choose "Auto backendless" database type in the Proxy page, the backend database will be managed by SyncProxy itself. This is well suited for mobile application without dedicated backend, which means that all data will flow from mobile to mobile only. A chat app is a good example of such an application.
In addition, the schema may be discovered from the data sent by the mobile app during the first sync. The same applies for a NoSQL database created without any schema.
Here are the rules to proceed:
1. The mobile database must be created by the mobile app, since SyncProxy sync client doesn't know the schema.
2. The SyncProxy sync client must be used with the attribute tablesToSync containing the list of tables to sync (otherwise, sync client will throw a warning "No sync schema").
3. Check the Allow clients to sync without server schema checkbox in the Database schema page
4. Enter data in the mobile app and launch sync, in order to provide a data structure sample to SyncProxy during the first sync.
5. Then go back to the Database schema page, verify that the schema has been discovered automtically, and uncheck the Allow clients to sync without server schema checkbox.
Now you should be able to sync normally, like with any other kind of database.
SyncProxy will add a bunch of structures to your database (depending on your database type: tables, triggers, stored procedures...) that will optimize change detection and enable real time reactive sync.
To prepare specific SyncProxy structures in your database, simply click "Prepare database" button in the Database schema page.
To enable users to sync, you will create a group to which a sync profile will be associated (more on this below), then invite users to join.
From the admin menu, click on "Groups" and click on "New group".
This will open the Group page:
Give a friendly name to the group, the click on "Users":
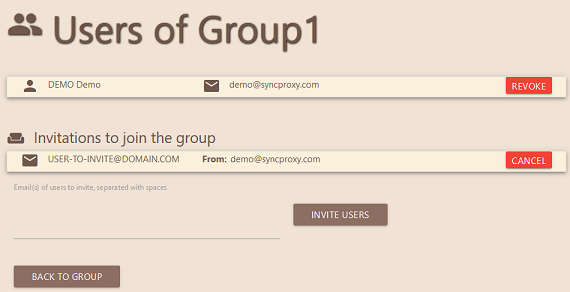
The page shows the list of current members of the group, and pending invitations as well.
To invite new users, simply type their emails and click on "Invite users". They will be notified automatically by email.
At any moment, you can revoke members or pending invitations. As an admin, you're the Boss, after all !
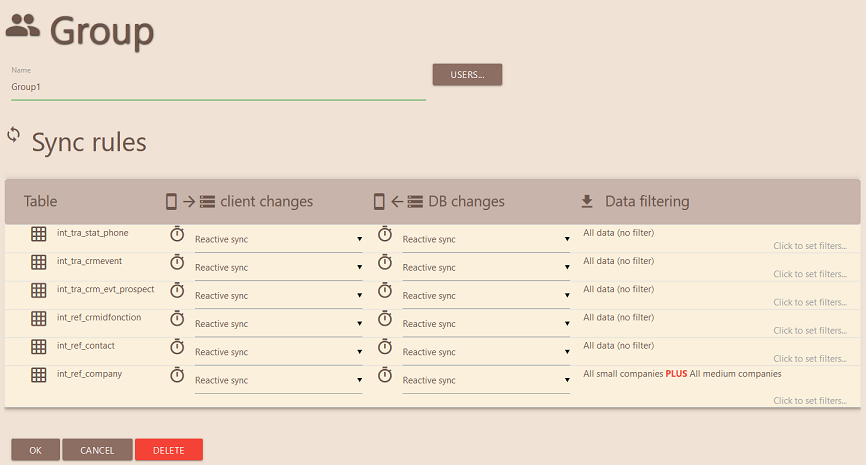
The sync profile attached to the group will determine How and What your users will sync:
- Types of synchronizations for each table and for both mobile/server directions: Reactive Sync / (non reactive) Sync / No sync
- Data filtering for each table: using filters will restrain the data that will be sent to the user during synchronizations (filter has no effect on data synched from the mobile to the server).
Back to the Group page (see above), select the desired syncs types for each table.
Data filtering is a very powerful SyncProxy original built-in feature that will save you many hours of hard coding.
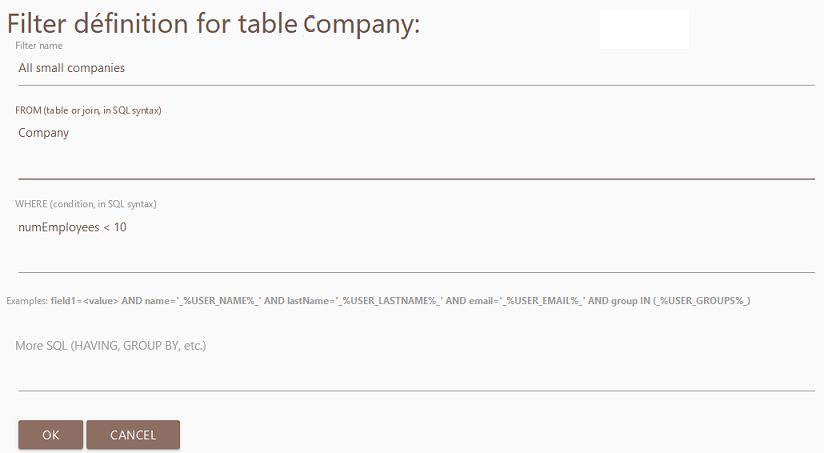
The principle of filters is extra-simple: to restrain the data delivered to users during syncs, simply create a filter for the desired SQL table (or collection, in case NoSQL terminology applies to you). Use the exact same syntax as usually for querying your database, i.e.: SQL syntax for a SQL database (SQL Server, MySQL, Oracle...), or NoSQL query for a NoSQL database such as MongoDB for instance.
Example for SQL Server:
Example for MongoDB:
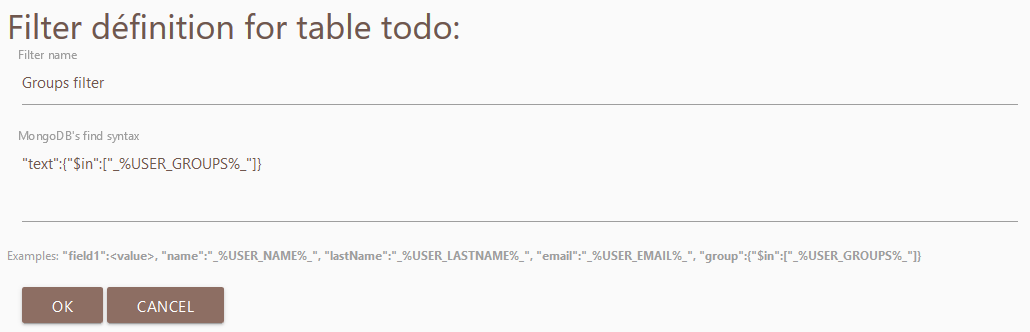
Note the ability to use super variables embedded within opening "%" and closing "%":
- %USER_NAME%
- %USER_LASTNAME%
- %USER_EMAIL%
- %USER_GROUPS%
which contain respectively user's name, last name, email address, and the list of groups to which the user belongs. Those super variables are resolved at sync time, which makes them very efficient to customize the data filtering.
An unlimited number of filters can be created for each table within a group. This will result in sending to the users the LOGICAL OR combination of filters. For example, if the two following filters are defined on the table Company:
- (Small companies): SELECT * FROM Company WHERE numEmployees < 100
- (Large companies): SELECT * FROM Company WHERE numEmployees > 1000
then all small-size companies data PLUS big-size companies data will be sent to the users of the group (equivalent to SELECT...FROM...WHERE...OR ...)
Since a user may belong to several groups, its filters from within each group will combine the same way as they combine within one group. That means that the user will receive the LOGICAL OR combination of filters of each groups he belongs to.
To summarize what happens when combining sync filters or sync profiles, simply think of it the intuitive way: if a user is granted the right to receive some data in a context, he or she will receive all data combined by the best rights he/she has been granted in different groups.
Important: when no filter is defined on a table, all data from this table are sent during synchronizations.
In some cases when the users work offline, it may happen that the same data (row or record) be modified simultaneously on the mobile app and in the database. In such a case, during the next sync inputs conflict and a version of the same row (typically the oldest one) is destroyed and replaced by the other.
The conflicted rows destroyed during sync are saved and can be retrieved from a table named ProxXXX_conf_TableName in your database (for example: ProxF3Z1_conf_Company).
The effect of sync inactivation is immediate.
The admin menu gives access to several useful real time reports stathat show various statistics on sync sessions:
- Users
- Sync clients (each device is identified by a unique code generated during the first sync)
- Sync sessions

Using the Sync on/off toggles, you can easily inactivate the synchronizations for a sync client, a user, a group, or a whole proxy, respectively from the pages Sync clients, Users, Groups, and Proxies:
The page Activity shows the synchronized data in real time: rows inserted/updated/deleted, sync durations...
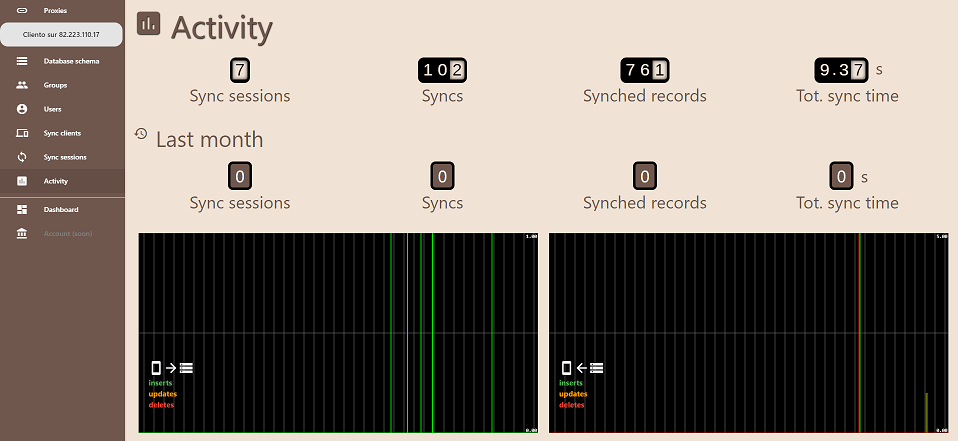
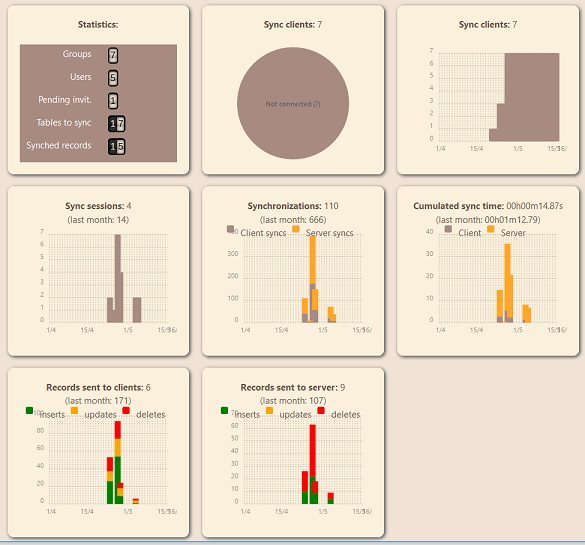
A monthly dashboard summarizes the usage of your sync proxies (you can toggle statistics between the currently selected proxy, and all proxies)
To access SyncProxy administration to setup your sync proxy and connect to your backend database, go to https://www.syncproxy.com.
Also have a look at the Quick start guide for Ionic which explains how to easily add sync client to your mobile apps.