===============
This is a working app, but is also intended to act as a clear sample of how to integrate and deploy a multi-site Azure App Service architecture in a resource group, with table storage used as a back-end nosql database, a web front end in app service and an Azure Functions middle tier.
Azure Active Directory and Azure App Service EasyAuth are used with ADAL.js to take care of OpenID Connect and OAuth Authentication and token handling.
The service is a simple example booking system, written as a Knockout / Bootstrap SPA
The front end is pure HTML5/js, using knockout for data binding, moment.js for date handling and bootstrap for UI styling. It uses Azure Functions for it's API / Middle Tier and is deployed via the KUDU Zip API to Azure app service Azure Table Storage is used on the back end for data nosql storage.
The provided poshdeploy script should be run to configure the environment, but first...
You will need to create the AD Application registration manually, for some reason the AD cmdlets do not correctly setup the application as yet. Ensure that you create the app uri correctly (it should be in the format https://-ukofficehours.azurewebsites.net). If you do this correctly, then the script below will correctly detect your application registration and auto-configure the app for you.
The script should then take care of everything else apart from setting the Azure AD App Manifest to allow oauth implicit flows, which you will have to do manually in the Azure AD part of the azure portal. Set "oauth2AllowImplicitFlow": true in the application manifest
Once this is done, this script should run on any machine with the azure sdk installed -- powershell hints below.
- Download the repo
- In the azure portal create an Azure AD Application called -ukofficehours
- Login first with Login-AzureRmAccount, or VSTS, then run poshdeploy.ps1
- cd to \UKOfficeHours\UKOfficeHours
- .\armdeploy\poshbuildanddeploy -deployname ""
Valid environment codes for our internal usage deployment are "lo","cd","de","ts","pr", but any free combination can in theory be used. "lo" local services configured to interact with a local frontend "co" continuous delivery "tr" training environment with realistic user dummy data "tp" test environment (with performance settings for perf and load test) "pr" production / live environment
If you are using this outside Microsoft, you will need to generate this code yourself and ensure it is globally unique as it will form part of the unique uri for your app.
Skipping -deployname param will run a dummy ci deployment to a resgroup of "dc" - a dummy ci testing environment.
For local debugging to work, you also probably want to add your local endpoint addresses to the Azure AD endpoints list.
TL;DR; Apart from that, get the repo and do this to deploy a dev environment. PS C:\Repos\UKOfficeHours\UKOfficeHours> .\armdeploy\poshdeploy "yo" There are override params in the deploy script to specify AD params if you don't have permissions to autodiscover them
.\armdeploy\poshdeploy -deployname "lo" -rg "ohlo" -loc "UKSouth" -sub "Internal Subscription" -localtenantoverride "xxxx88bf-86f1-xxxx-91ab-xxxxxxb47" -localappidoverride "xxxxxxx-5db0-4fe9-a8df-9xxxxxe814c" -localtenantdomainoverride "contoso.com"
Visual Studio Team System is used to trigger and host the build and deploy system, whilst the primary code repo is here.
The starter config of our CD build/deploy looks like this.
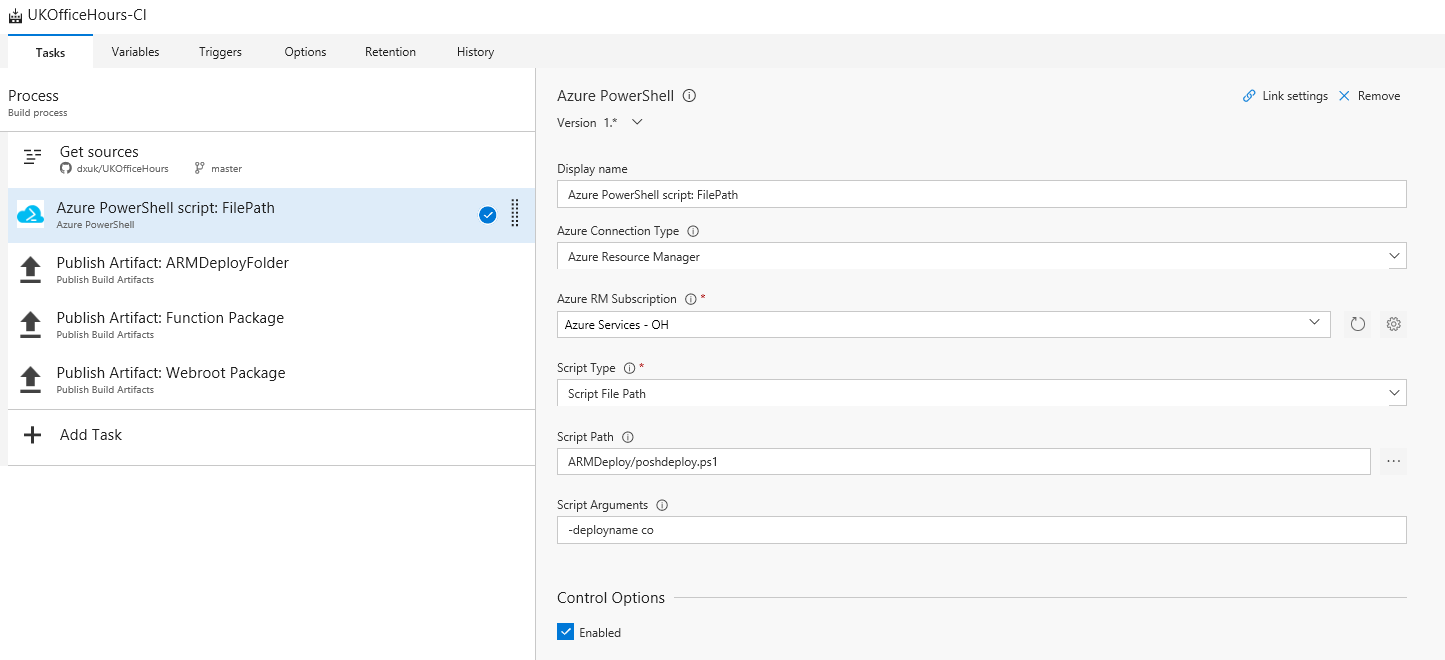
To use another CI/CD tool (Why?)- simply comment out the stages you don't need in poshdeploy.ps1 and host the scripts somewhere else.
27/06/2017 = Implementing the Extensions for Storage Client Side Encryption - this will use a keyvault for client side encryption if you are storing PII in your service (email address and name are PII).
But you will now have to create the AD Service Principal Key and the Keyvault key manually
Open the portal and head to your application registration, then create a new key Once that is done you can set the access policy for your Vault
Set-AzureRmKeyVaultAccessPolicy -VaultName $vn -ServicePrincipalName $sp -PermissionsToKeys All