Behavioral Cloning Project
The goals / steps of this project are the following:
- Use the simulator to collect data of good driving behavior
- Build, a convolution neural network in Keras that predicts steering angles from images
- Train and validate the model with a training and validation set
- Test that the model successfully drives around track one without leaving the road
- Summarize the results with a written report
Here I will consider the rubric points individually and describe how I addressed each point in my implementation.
My project includes the following files:
- model.py containing the script to create and train the model
- drive.py for driving the car in autonomous mode
- model-new.h5 containing a trained convolution neural network
- writeup_report.md or writeup_report.pdf summarizing the results
- run7.mp4 -> my video of car driving through Track 1 (Jungle Track)
- Training.ipynb training steps and augmentation visualization
- examples where I keep th images for writeup
- models - some models I trained and saved for future project loading
Here are some video links to the stages of training and the final runs of the project enjoy :)
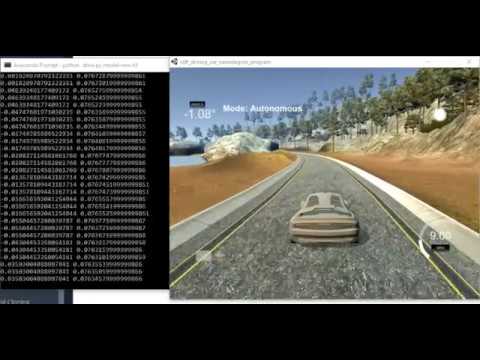
Using the Udacity provided simulator and my drive.py file, the car can be driven autonomously around the track by executing
python drive.py model.h5Video of the driving is provided in the run7.mp4, You tube link for the https://www.youtube.com/edit?video_id=1iK4doC1Y6U
The model.py file contains the code for training and saving the convolution neural network. The file shows the pipeline I used for training and validating the model, and it contains comments to explain how the code works.
The model.py makes use Keras, Tensorflow for training the images and these are the additional libraries that is made use of
''' import csv import os import cv2 import numpy as np import pandas as pd import matplotlib.pyplot as plt import sklearn from collections import Counter
from sklearn.model_selection import train_test_split from collections import defaultdict
from PIL import Image import math from random import shuffle '''
I have used additional functions which help in reading the lines from csv file, loading the images and measurments, removing the zero measurement lines (randomly)
Augmentation code contains Flipping image Changing the colors from RGB2HSV. I tried reshaping the images in the augmentation but while launching the video it complained that size is 60,320,3 and trained model is of differnt shape :-(. I saw some of the students made it work with resized image, I need to see whether it is because they used padding or otherwise.
Model Code I tried Nvidia and LeNet Model, I intend to use other model but due to lack of time, I stuck to only these two models.
The model.py file contains the code for training and saving the convolution neural network. The file shows the pipeline I used for training and validating the model, and it contains comments to explain how the code works.
Flow of the code can be explained here.
model.py takes various arguments so that I can keep training the model on various datasets and choose the different hyperparameters without having to rewrite the code each time. ''' Here is the explanation of the arguments that I processed.
-l --load_model - Path to model definition for loading h5 model
-s --save_model = saving the model defination both JSON and wieght in H5 format
-m --choose_model - Choosing the Various Training Models such as Nvidia or LeNet, by default it is NVIDIA.
-t --Training_data - Folder where IMG, driving_log.csv resides
-e -- Number of EPOCHS to train
-b -- Batchsize this was very helpful if your data set is very large
-te -- Number of Training Samples per EPOCH this controlled how many samples trained in each EPOCH
-r -- recursive the folder '''
Once the args are parsed, as per the args control would flow.
- Read the Lines from CSV file and store it as list
- Remove the zero lines, or random lines which is below the Threshold.
- Create a generator for Training and Validation
- Call the Model either Nvidia or LENET
- Plot the history
I have tried two models one is

In the LeNET Model I start with Lambda layer, followed by the Cropping layer -> Followed by a Max Pooling 2D interconnected with a convnet 2D layer, with succession of flattening out the inputs and then Calling Dense layers.
There is no drop out since I thought this could be underfitting Model and there are no unnecessary additional tensors that we need to drop.
This is the Training vs Validation Loss plotted

Nvidia model shown below and which is widely discussed in the paper here : http://images.nvidia.com/content/tegra/automotive/images/2016/solutions/pdf/end-to-end-dl-using-px.pdf https://devblogs.nvidia.com/deep-learning-self-driving-cars/

This model flows like this.
- First Layer for Normalization
- Layer for Cropping the Images
- Convolution Layers - 5 5x5 convnet kernels - 3 with activation RELU 3x3 convnet kernels - 2 Flatten layer to connect Fully Connected Layers 1 Fully Connected Layer (100) Drop out (0.5) 2 Fully Connected Layers 50 & 10 with activation RELU.
This shows the Plotted Training vs Validation Loss for Nvidia Model.

This also dependended on the training data, enough training data provided better fitting and lower validation loss compared to fewer training data.
During the course of training I found out that while my training loss is low but validation loss seems to be mounting as you can see from the below figure

As per the class notes When the model predicts well on the training set but poorly on the validation set (for example, low mean squared error for training set, high mean squared error for validation set), this is evidence of overfitting.
use dropout or pooling layers --- > This did not work
use fewer convolution or fewer fully connected layers ---> This seems to be not working.
collect more data or further augment the data set ---> Finally I settled on this one, I collected more samples to avoid overfitting the model.
Some of the Hyper parameters I discussed already, Even though I did not tune the Adam optimizer training value, I did few other tunings such as
- Changing the EPOCH values
- Training samples per epoch
- Batchsize --> If the batchsize is above 128 then usually memory limit error shows up in EC2 instance.
Training data was chosen to keep the vehicle driving on the road. I used a combination of center lane driving, recovering from the left and right sides of the road
Various data collection approaches.
- Driving Two lapses around the Track 1
- Driving in Opposite direction around Track 1
- Driving around corners
The overall strategy for deriving a model architecture was to collect enough data, transform the collected inputs and then apply the correct learning model with good hyper tunable parameters.
My first step was to use a convolution neural network model using LENET architecture which did not give good results after enough trials. Then I tried using the NVIDIA Model it gave very good results, with both training and validation loss climbing down in the plotted loss chart.
In order to gauge how well the model was working, I split my image and steering angle data into a training and validation set. I found that my first model had a low mean squared error on the training set but a high mean squared error on the validation set. This implied that the model was overfitting.
To combat the overfitting, I modified the model so that I used the dropout layers, collected more data, reduced the number of convolutions and then finally added more training to training data set (Which of course worked).
The final step was to run the simulator to see how well the car was driving around track one. There were a few spots where the vehicle fell off the track, At one point of time I saw that even though I converting the images from RGB to HSV, but I am doing this for every image, this caused some issues, more often than not vehicle fell of the track to reduce this I added the actual images to the training track without actually doing any transformation on them.
One thing I learned is transformation are good for generalization but you can't keep transforming the images and hoping that your generalized model will work on any track. You need to process the images as it is and let the Neural network learn from it.
At the end of the process, the vehicle is able to drive autonomously around the track without leaving the road.
The final model architecture (function model_nvidia) consisted of a convolution neural network with the following layers and layer sizes ...
| Layer | Description |
|---|---|
| Input Image | 160x320x3 RGB |
| Lambda Layer | Normalization and standardization layer |
| Cropping2D Layer | Crops the image and produces a 65x320x3 |
Convolution 5x5 |
2x2 stride, VALID padding with relu activation, outputs 31x158x24 |
Convolution 5x5 |
2x2 stride, VALID padding, with relu activation, outputs 14x77x36 |
Convolution 5x5 |
2x2 stride, SAME padding, with relu activation, outputs 5x37x48 |
Convolution 3x3 |
1x1 stride, VALID padding, with relu activation, outputs 3x35x64 |
Convolution 3x3 |
1x1 stride, VALID padding, with relu activation, outputs 1x33x64 |
| Flattening | Flattened the 1x33x64, output 2112 feature array |
| Fully connected | Applies with relu activation, takes 2112, and outputs 100 |
| Fully connected | Applies with relu activation, takes 100, and outputs 50 |
| Dropout | Applies dropout of 0.3 to reduce overfitting |
| Fully connected | Applies with relu activation, takes 50, and outputs 10 |
| Regression layer | Takes 10, outputs 1 or 2 if multivariant |
| Mean Squared Error | Softmax cross entropy |
| AdamOptimizer | Optimize the model with a decaying learning rate |
Note: I am making some changes to the model to add Normalization to improve the model but that is work in progress for now.
If you look at the collected data histogram you can clearly see that the most of the samples have centered around steering angle 0.

We can remove some of the 0 steering angle in the random fashion to get evenly distributed lines.

After adding right, left and center images together and adding the correction, finally the histogram looks evenly distributed.

After the collection process, I had X number of data points. I then preprocessed this data by following methods
-
Adding the Image to image collection

-
Processing through the RGB2HSV

-
Keras Lamda Layer Visualization

-
Keras Cropping Layer Visualization

-
Usage of Data Generators.


Initially I loaded all the images to the memory and trained the model via fit and did not batch, but soon after watching the class videos I thought it would be good if I do batch processing and this way I can minimize the load on my system, not trying to load all the 8400 images at once.Python generator is a method or a technique that behaves like an iterator and loads items when needed using the yield that is like a return, but keeps all the generator's variables intact.Keras fit_generator() uses generators to only load data batch by batch for a more optimized and data conscious approach.
- Adding Image Normalization after each Keras Layer.
- Adding Random shadows
- Adding random brightnees throughout the project
- Resizing the image before feeding to the Keras.
- Driving on Track 2 :-)
Some of the Mistakes I did
- Upgrading to Keras 2.1 ....this caused of lot of heart burn
- Not focusing on the data rather thinking about the Model, I guess you need to know your data well before you decide on the Model.
- Adding random drop outs to reduce overfitting.
- Not killing off the training which was taking more than 8 hours and trying to figure out why it was taking so long
- Not signing up for AWS as second backup, incase my desktop system with GPU doesn't work.
###REFERENCES ###
- Discussion in the Udacity Slack Channel
- Nvidia Architecture https://devblogs.nvidia.com/deep-learning-self-driving-cars/
- Ideas from various sources such as stackoverflow, Keras documentation, Fellow Udacity members.