Getting started with Raspberry Pi node red and IoT
In this tutorial we will learn how to set up a Raspberry Pi development board and get it to run a blinking LED loop in johnny-five inside of node-red and connect it to the Internet of Things.
You will need the Raspbian Jessie image installed on the pi. This doc was written based on the 2015-21-11 release.
You will also need to have network configured. Wifi or wired ethernet will do.
As of this writing, node.js (version 0.10.29) and the node-red application come pre-installed on raspbian, however for us to use johnny-five we'll need to run node-red as the root user.
Edit the /etc/init.d/nodred script in your favorite text editor on the pi.
Switch the line containing USER=pi to USER=root
In the latest version of raspbian (2016-03-18-raspbian-jessie), the script file is /lib/systemd/system/nodered.service.
Run sudo node-red-start the open a web browser to http://<YOUR PI's IP ADDRESS>:1880
The startup also created a /root/.node-red folder which contains settings node-red to allow you to set an admin password as well as configure things like the port number.
The raspbian image doesn't include npm, however it is easy to install:
sudo apt-get update
sudo apt-get install npm
Unfortunately this only gets us npm version 1.4.21 which wont work for us, but that's easily updatable:
sudo npm i npm -g
We'll need to add some packages to node-red for johnny-five in the root's .node-red directory:
sudo su -
cd .node-red
npm i node-red-contrib-gpio
That takes a couple of minutes to finish on a raspberry pi 2, and gets us the GPIO and johnny-five nodes. At this point we could plug in an arduino uno to a USB port and get started, however let's add raspi-io so that we can use the pi's onboard pins.
npm i raspi-io
At this point we'll need to reboot.
sudo reboot
Then start node red up again.
sudo node-red-start
Once again, point your browser to http://<YOUR PI's IP ADDRESS>:1880
Drop a johnny-five node into the node-red workspace and double click it. Click the edit button to configure a new nodebot, and select Raspberry Pi as the nodebot type and click Add.

Then in the onReady code block you can do something like:
var led = new five.Led('GPIO4');

led.blink(500);
Click the deploy button on the upper-right of node-red.
If you have an LED connected to GPIO4 it should start blinking!
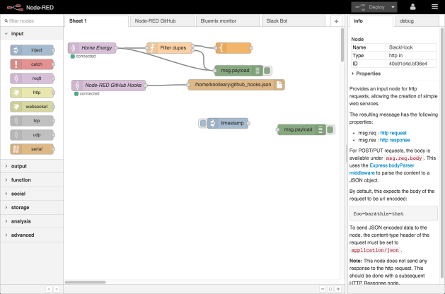
Node-red comes with things like websocket and MQTT nodes. Another really cool set of nodes to add to help connect devices are the nodes for the open source meshblu project.
From the same /root/.node-red directory, we can run:
npm i node-red-contrib-meshblu
This gets us some new input and output nodes for sending IoT messages.

The node-red-contrib-gpio nodes already includes all of johnny-five, and there's a ton of other johnny-five related libraries we can easily include by installing them with npm.
Let's use oled-js for example.
npm i oled-js oled-font-5x7
Now in our johnny-five node we can do something like this:
var Oled = require('oled-js');
var font = require('oled-font-5x7');

var opts = {
    width: 128,
    height: 64,
    address: 0x3C
};

var oled = new Oled(board, five, opts);
oled.turnOnDisplay();
oled.clearDisplay();

oled.setCursor(1, 1);
oled.writeString(font, 1, 'Hello, node red !', 1, true, 2);
Perhaps we want incoming messages to do something to our nodebot.
We can use node-red to connect an inbound message node to the input of our johnny-five node.

In our johnny-five node we can listen for events and do something with the data, like writing it to our oled screen:
node.on('input', function(msg){
    oled.clearDisplay();
    oled.setCursor(1, 1);
    oled.writeString(font, 1, String(msg.payload), 1, true, 2);
});We can connect the output of our johnny-five node to any other type of node.

Then just wire up a physical button to your board, handle button press events by passing a new message along:
var button = new five.Button("GPIO4");

button.on("press", function() {
    node.send({payload: "johnny-five is awesome!"});
});