


Full CMS System with easy to use page builder & theme manager for FilamentPHP
composer require tomatophp/filament-cmsafter install your package please run this command
NOTE if you need to custom some feature please don't use this command and follow the next steps because this step run migration and you need to custom config before run migration.
php artisan filament-cms:installfinally register the plugin on /app/Providers/Filament/AdminPanelProvider.php
->plugin(\TomatoPHP\FilamentCms\FilamentCMSPlugin::make())now please publish and migrate media table
php artisan vendor:publish --provider="Spatie\MediaLibrary\MediaLibraryServiceProvider" --tag="medialibrary-migrations"
php artisan migrate
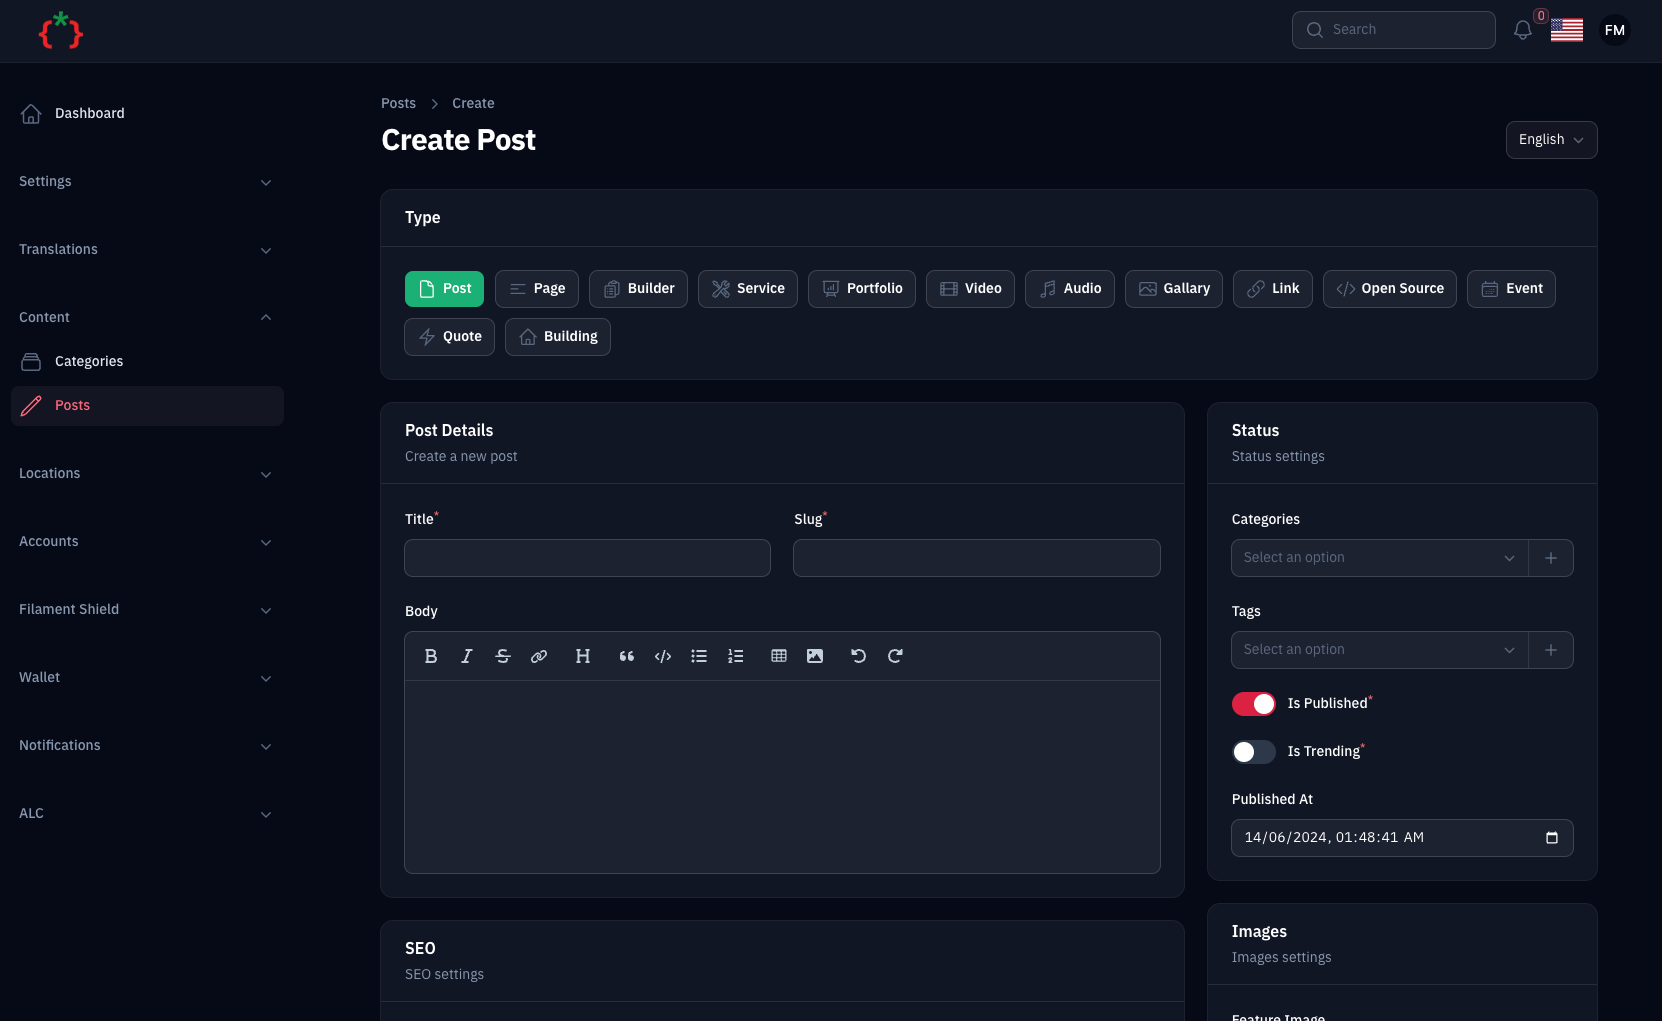
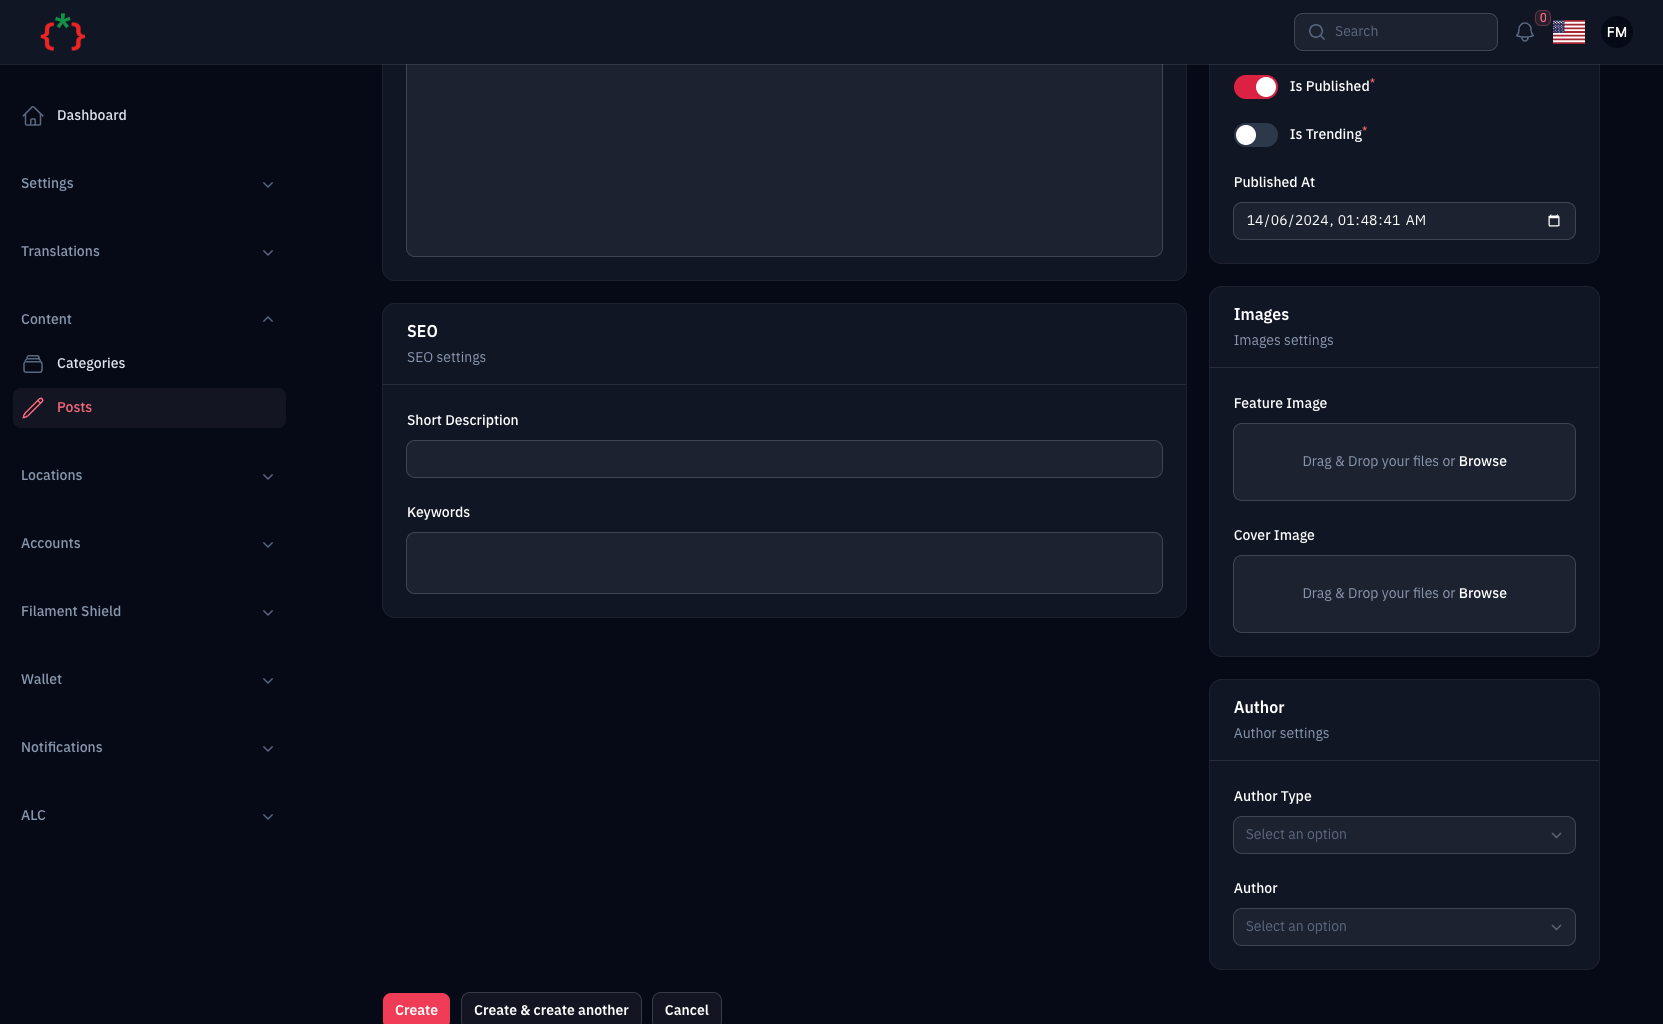
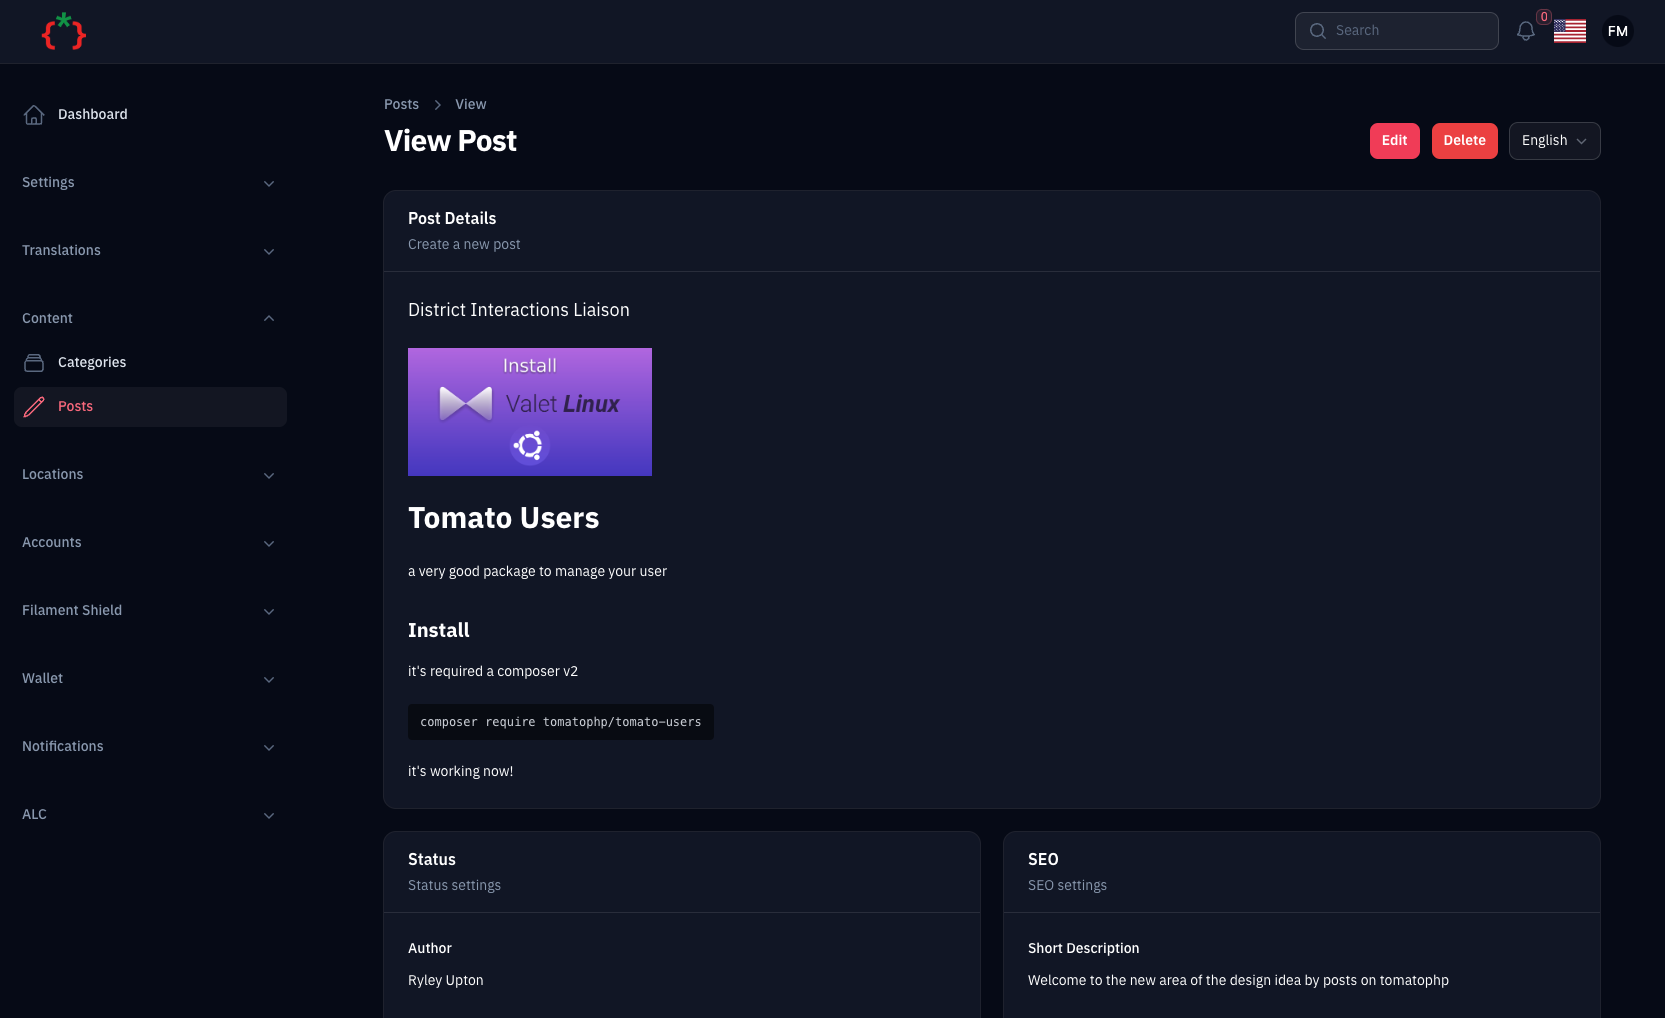
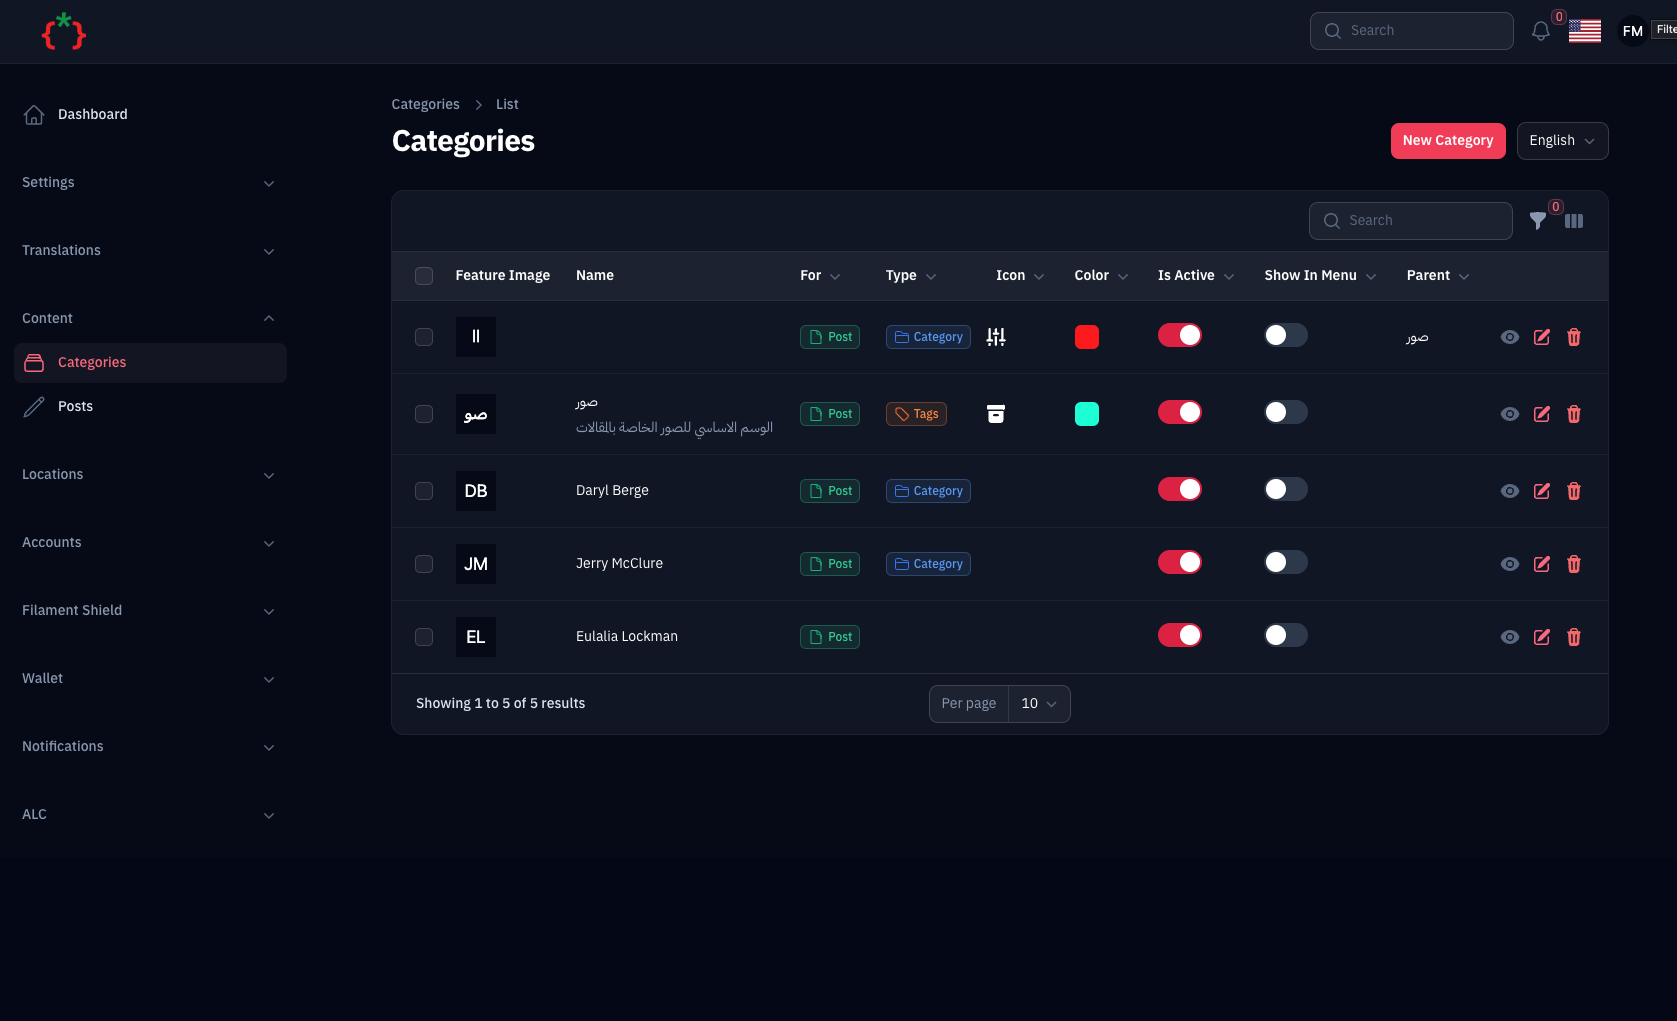
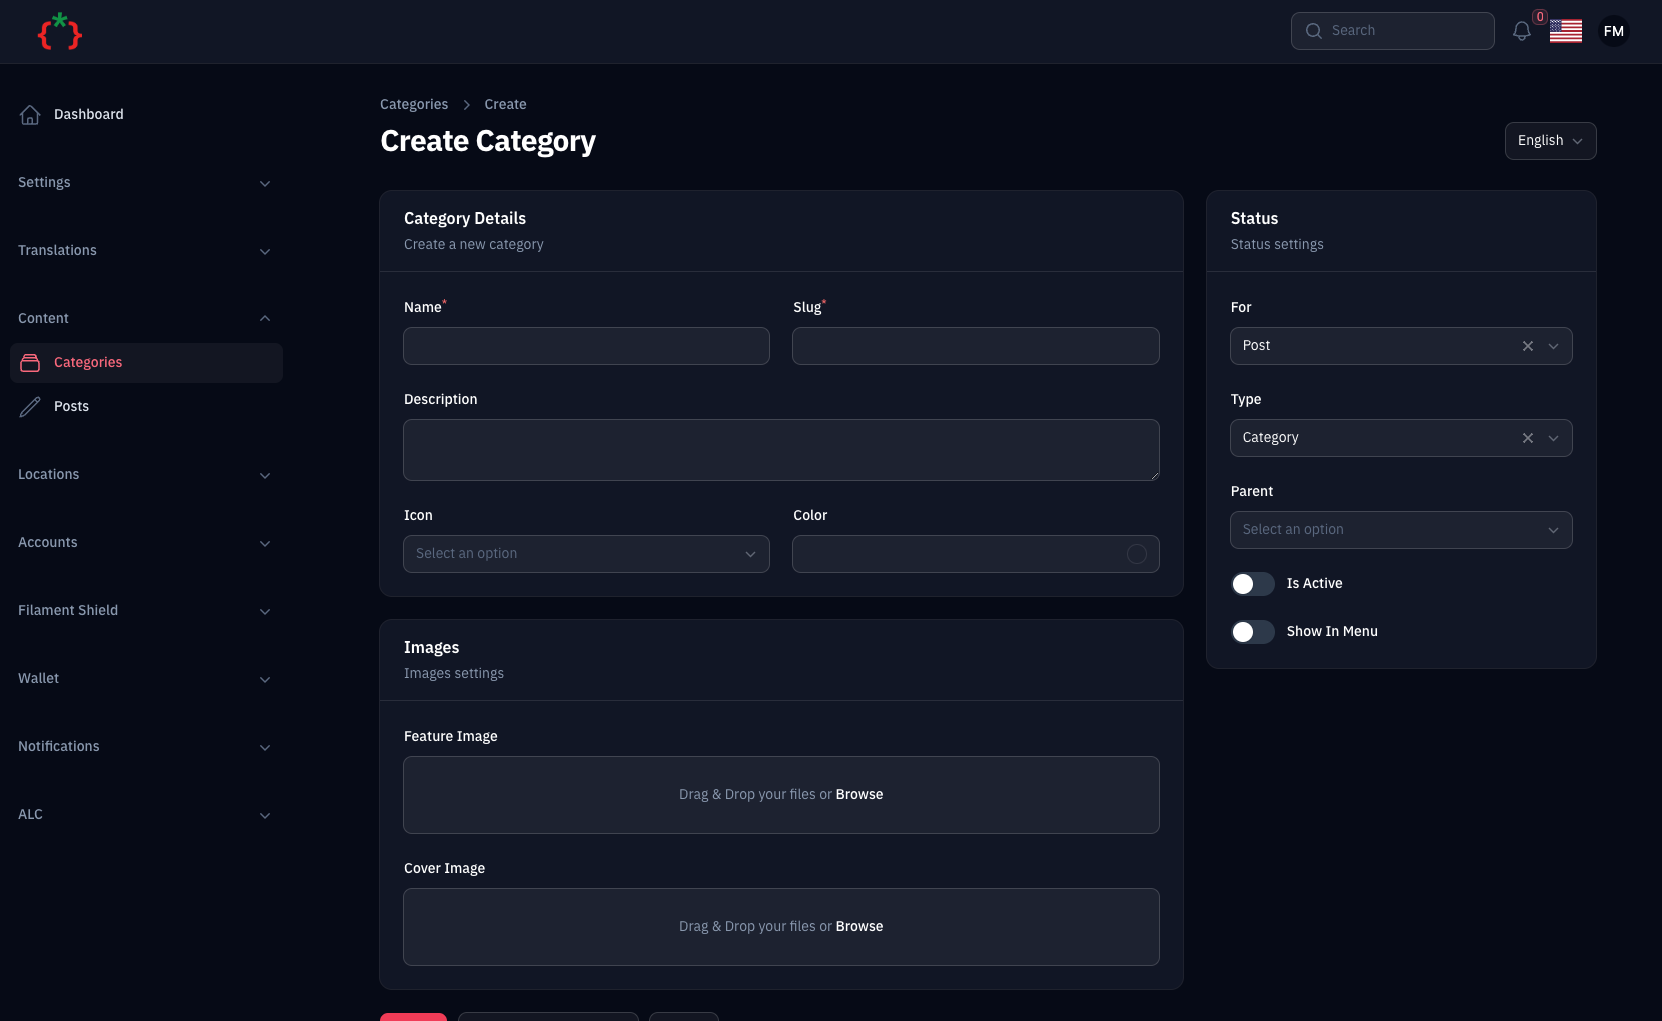
- Content Manager
- Content Comments & Ratings
- Youtube Meta Integration
- Behanace Content Importer
- GitHub Content Importer
- Content Import & Export
- Page Builder
- Theme Manager
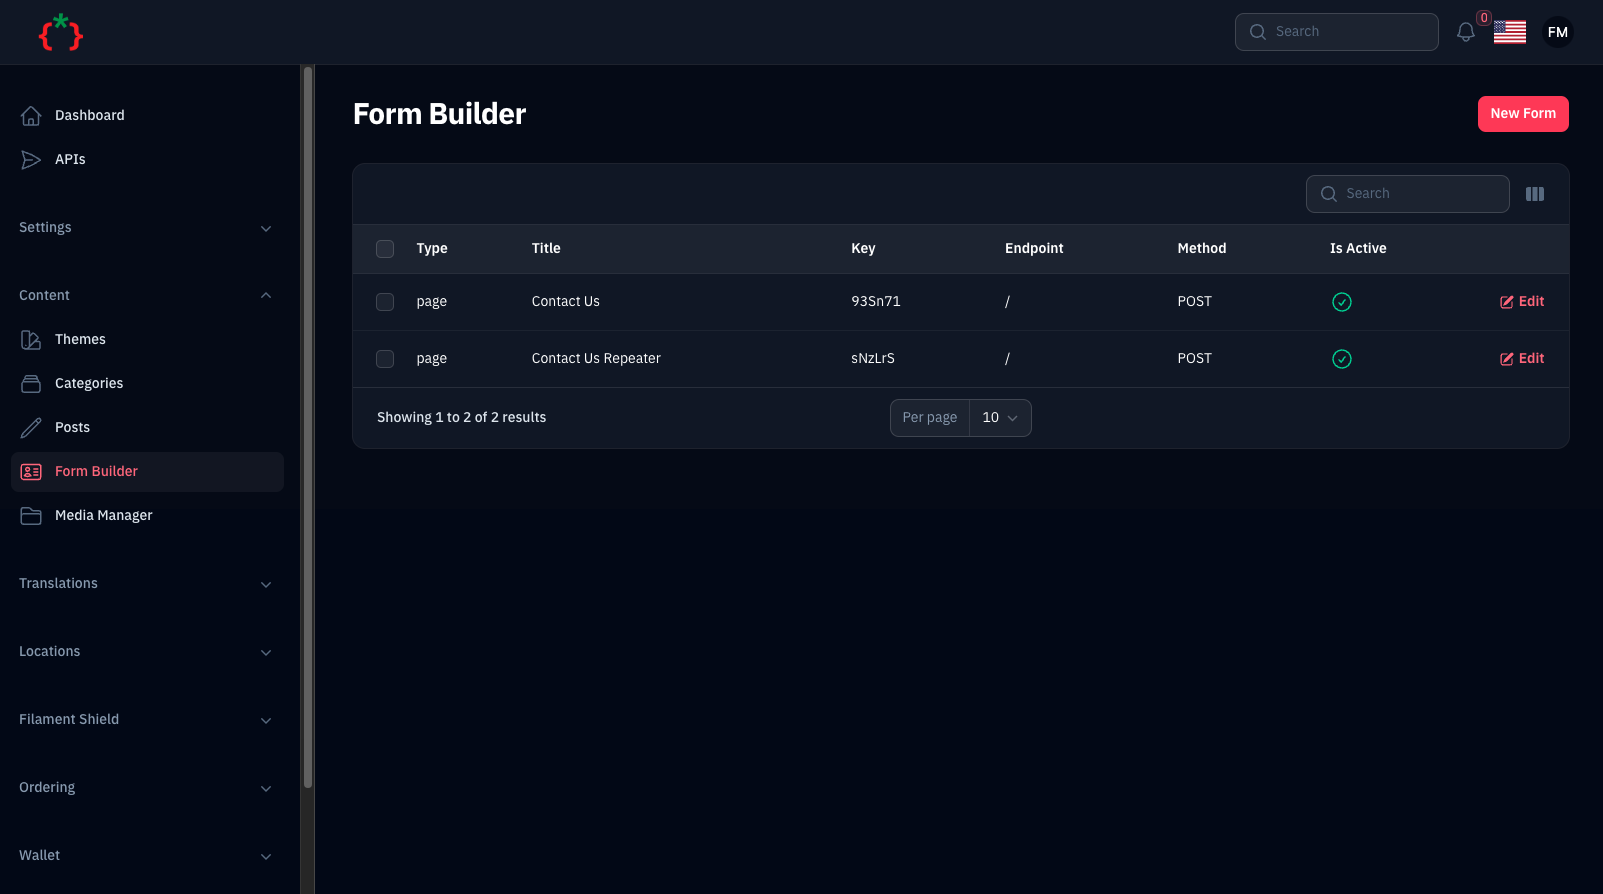
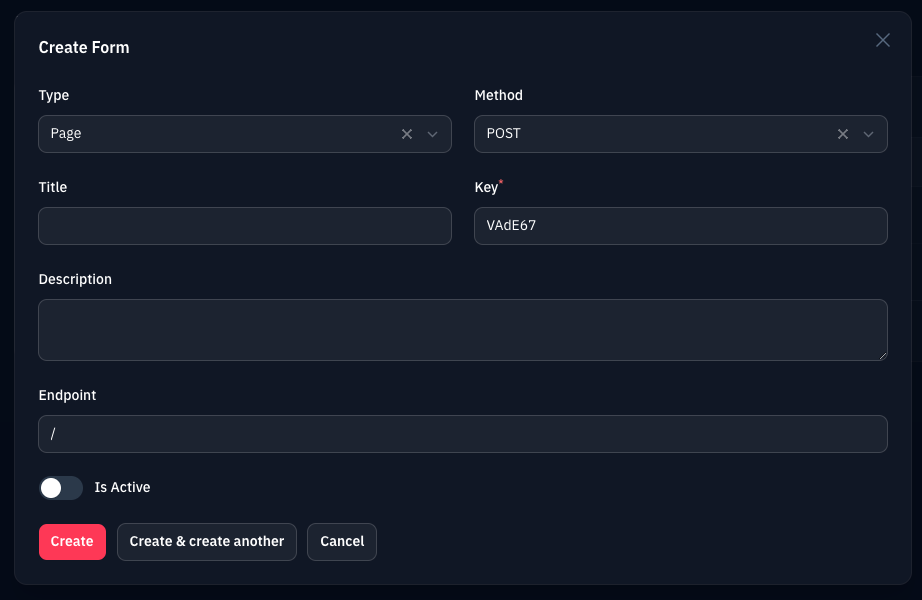
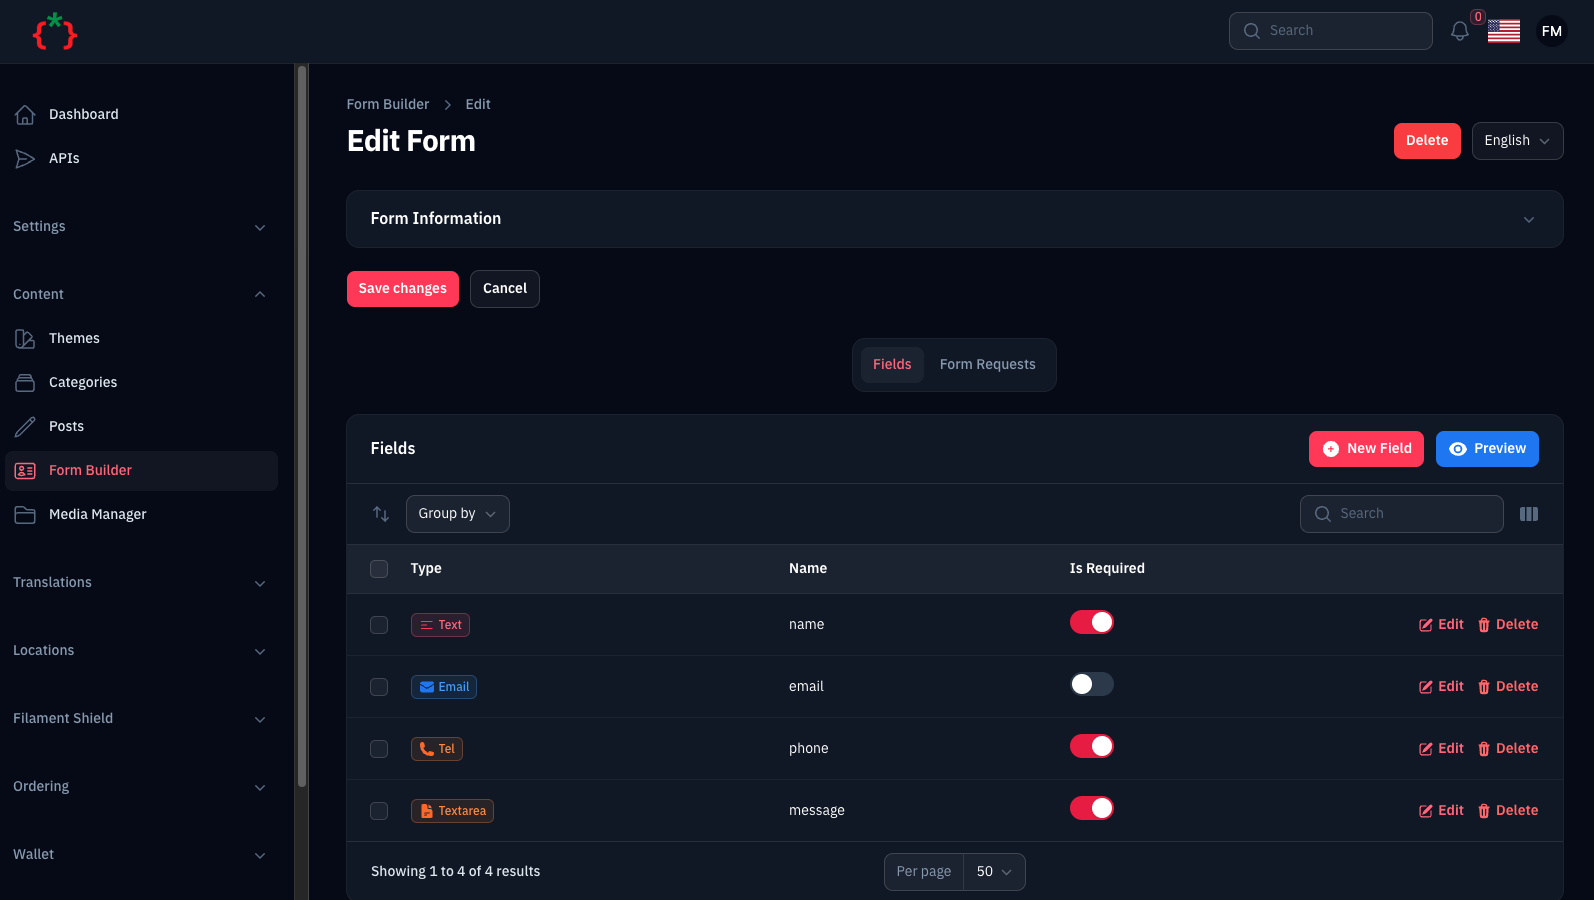
- Form Builder
- Ticketing System
- REST API
you can allow import content from youtube by adding YOUTUBE_KEY to your .env
YOUTUBE_KEY=YOUR_YOUTUBE_KEYnow on your panel provider /app/Providers/Filament/AdminPanelProvider.php add this method
->plugin(\TomatoPHP\FilamentCms\FilamentCMSPlugin::make()->allowYoutubeImport())first of all you need to install dusk as a main package to allow this feature
composer require laravel/dusknow install dusk driver
php artisan dusk:installnow you need to allow behanace import on your panel provider /app/Providers/Filament/AdminPanelProvider.php add this method
->plugin(\TomatoPHP\FilamentCms\FilamentCMSPlugin::make()->allowBehanceImport())you can add a custom type to the CMS by using Facade method on your AppServiceProvider boot() method
use TomatoPHP\FilamentCms\Facades\FilamentCMS;
use TomatoPHP\FilamentCms\Services\Contracts\CmsType;

public function boot()
{
    FilamentCMS::types()->register([
        CmsType::make('building')
            ->label('Buildings')
            ->icon('heroicon-o-home')
            ->color('danger')
    ]);
}you can add more authors types by using Facade method on your AppServiceProvider boot() method
use TomatoPHP\FilamentCms\Facades\FilamentCMS;
use TomatoPHP\FilamentCms\Services\Contracts\CmsAuthor;

public function boot()
{
    FilamentCMS::authors()->register([
        CmsAuthor::make('Admin')
            ->model(\App\Models\User::class)
    ]);
}the theme manager is build with Laravel Modules so you need to install it first
Note: if you are install tomatophp/filament-plugins you don't need to install nwidart/laravel-modules because it's already installed
composer require nwidart/laravel-modulesnow on your composer.json add to psr-4 autoload
{
    "autoload": {
        "psr-4": {
            "App\\": "app/",
            "Modules\\": "Modules/"
        }
    }
}
now run this command to autoload themes
composer dump-autoloadand you need another package for caching and return themes as model we use sushi package
composer require calebporzio/sushinow on your config filament-cms
<?php

return [
    /*
     * ---------------------------------------------------
     * Allow Features
     * ---------------------------------------------------
     */
    "features" => [
        "theme-manager" => true,
    ],
];
now you need to active the settings table
php artisan vendor:publish --provider="Spatie\LaravelSettings\LaravelSettingsServiceProvider" --tag="migrations"
php artisan migrate
now you can use Theme manager to manage multi frontend themes on your app, on your panel provider /app/Providers/Filament/AdminPanelProvider.php add this method
->plugin(\TomatoPHP\FilamentCms\FilamentCMSPlugin::make()->useThemeManager())now you can access /admin/themes to manage your themes and you can create new theme use this command line
php artisan filament-cms:themeyou will find a new module with custom module.json file on your Modules directory
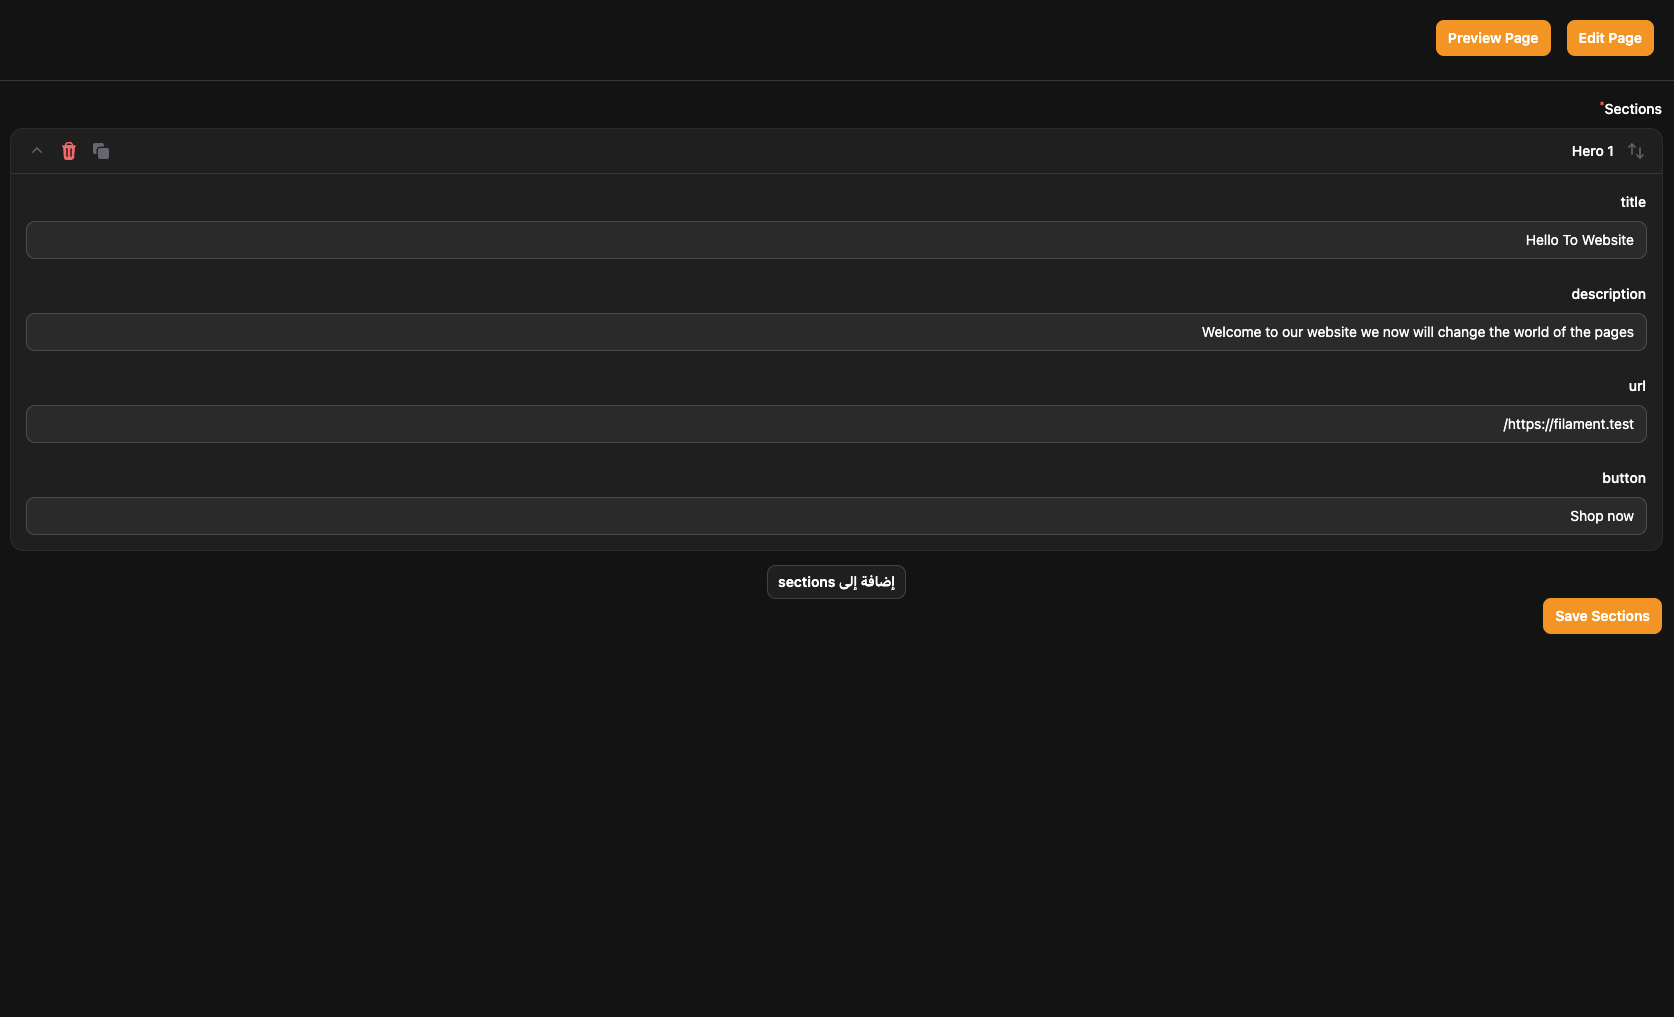
the page builder make it very easy to custom your page and generate an autoloaded pages to build your website using Sections to start using it you need to add this method on your panel provider /app/Providers/Filament/AdminPanelProvider.php
->plugin(\TomatoPHP\FilamentCms\FilamentCMSPlugin::make()->usePageBuilder())first thing you need to create a Section on your AppServiceProvider boot() method
use TomatoPHP\FilamentCms\Services\Contracts\Section;
use TomatoPHP\FilamentCms\Facades\FilamentCMS;
use Filament\Forms\Components\TextInput;

FilamentCMS::themes()->register([
    Section::make('hero')
        ->label('Hero Section')
        ->view('sections.pages.hero')
        ->form([
            TextInput::make('title')
                ->label('title'),
            TextInput::make('description')
                ->label('description'),
            TextInput::make('url')
                ->url()
                ->label('url'),
            TextInput::make('button')
                ->label('button'),
        ])
]);
NOTE: the section key must be unique
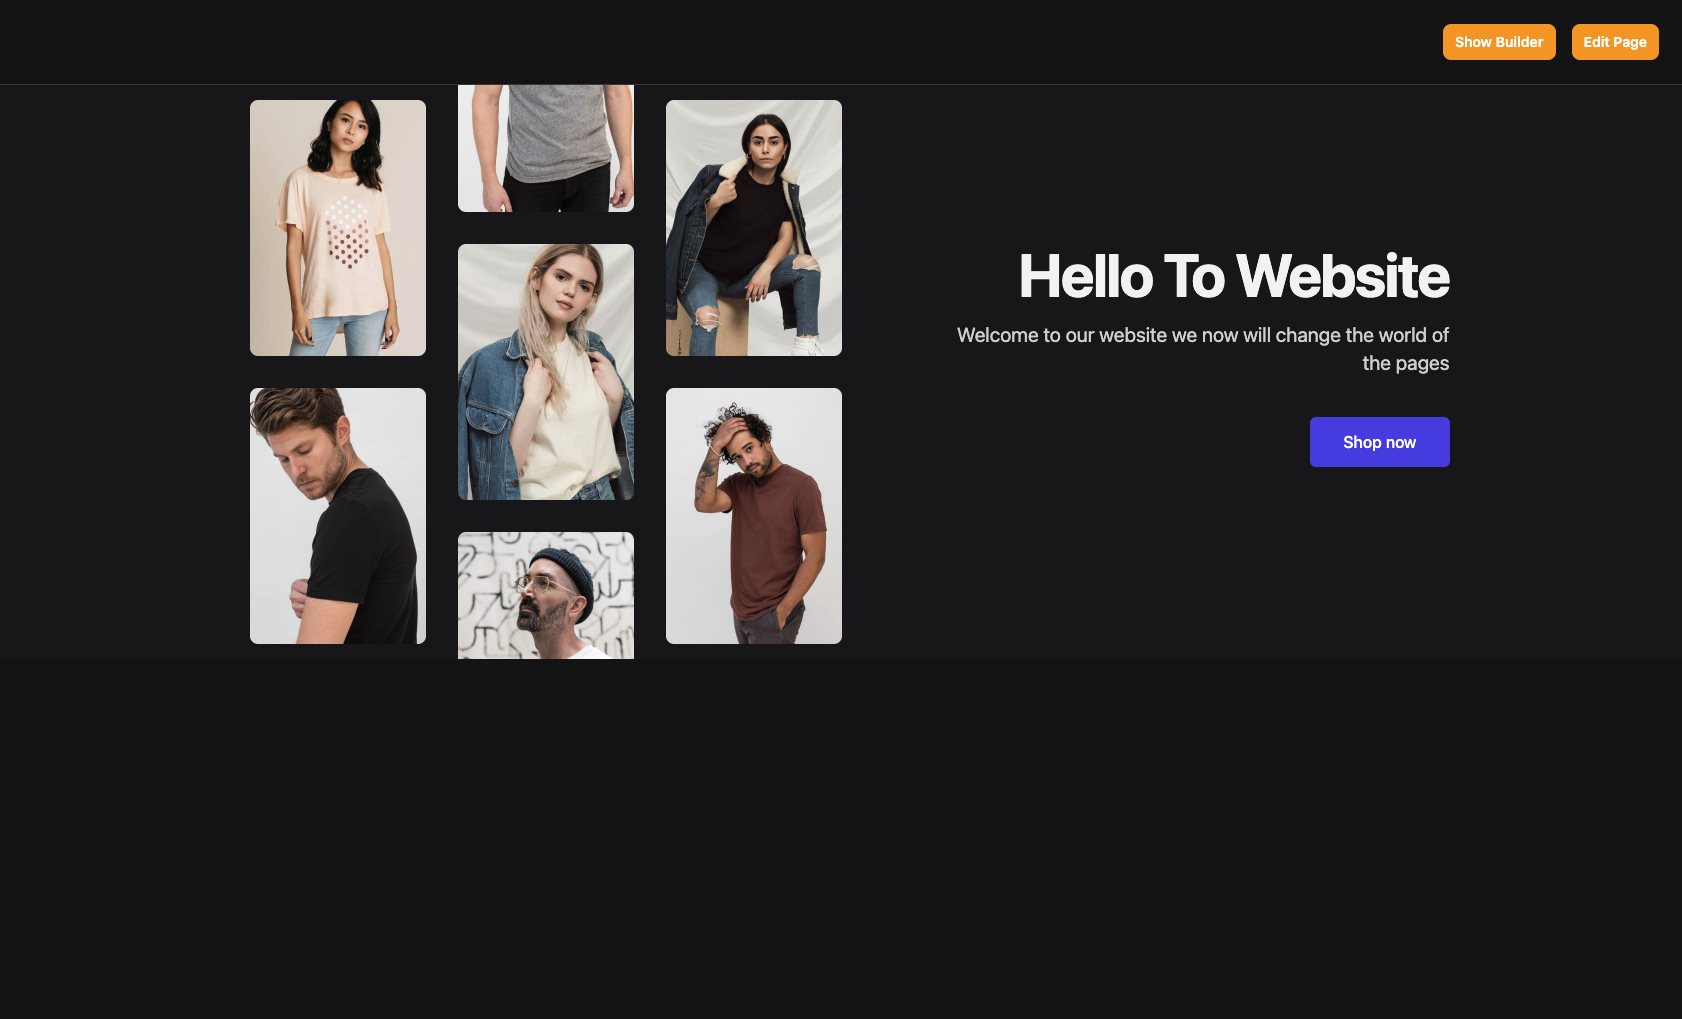
after register your section you can start using page builder, you need to create a new route for your page like this
use Illuminate\Support\Facades\Route;

Route::get('/', function () {
    $page = load_page('/');
    return view('welcome', compact('page'));
});
as you see you need to use load_page helper to load your page and pass it to your view, this method check if the page exists by slug and return the page data if page don't exists or deleted it will restore it or create it for you
on your welcome.blade.php file you need to use this blade component
<x-tomato-builder-toolbar :page="$page" allow-layout/>if you need to use Filament Layout to make it easy to active Livewire / Tailwind Style use allow-layout attribute if you need to use it without any style you can use it without this attribute
now if you open your page you will find the builder view like this
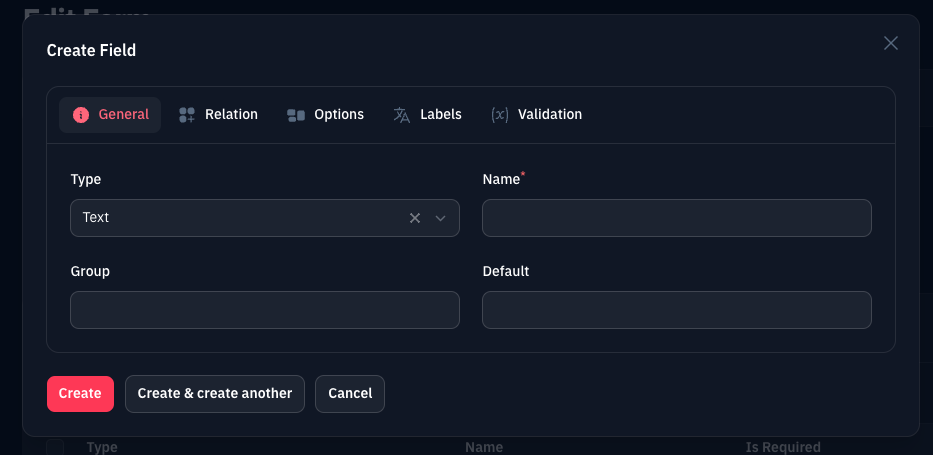
you can add more fields to the form builder by use this method on your provider.
use TomatoPHP\FilamentCms\Services\FilamentCMSFormFields;
use TomatoPHP\FilamentCms\Services\Contracts\CmsFormFieldType;

FilamentCMSFormFields::register([
    CmsFormFieldType::make('code')
        ->className(CodeEditor::class)
        ->color('warning')
        ->icon('heroicon-s-code-bracket-square')
        ->label('Code Editor'),
]);after create your form you can use it by key like this
use TomatoPHP\FilamentCms\Services\FilamentCMSFormBuilder;
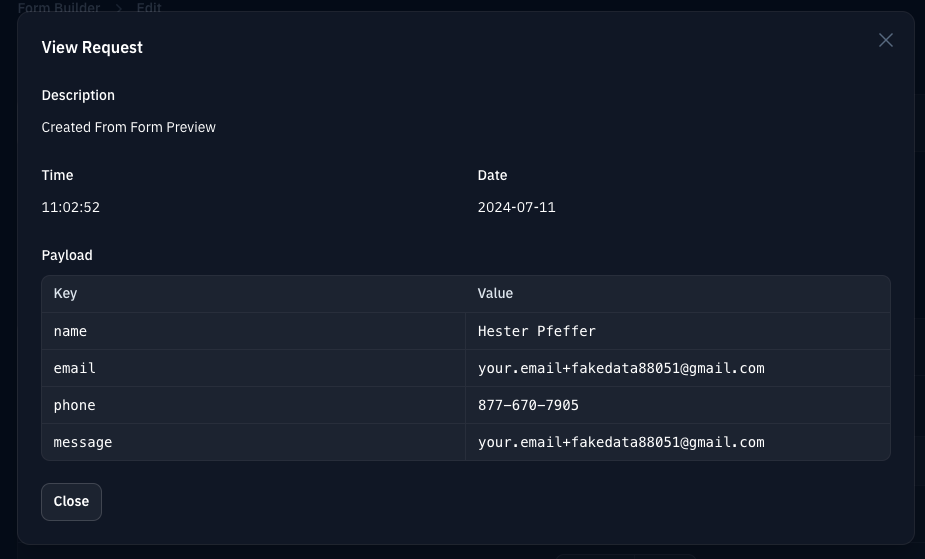
FilamentCMSFormBuilder::make('xvssd')->build()you can use form requests to submit your form data by use this method on your provider.
use TomatoPHP\FilamentCms\Services\FilamentCMSFormBuilder;

FilamentCMSFormBuilder::make('xvssd')->send($data)you can publish config file by use this command
php artisan vendor:publish --tag="filament-cms-config"you can publish views file by use this command
php artisan vendor:publish --tag="filament-cms-views"you can publish languages file by use this command
php artisan vendor:publish --tag="filament-cms-lang"you can publish migrations file by use this command
php artisan vendor:publish --tag="filament-cms-migrations"you can join our discord server to get support TomatoPHP
you can check docs of this package on Docs
Please see CHANGELOG for more information on what has changed recently.
Please see SECURITY for more information about security.
The MIT License (MIT). Please see License File for more information.