Please document anything that you contributed here! It helps current and future contributors of this website.
Feel free to email [email protected] or [email protected] if you have any questions! I'm always happy to talk with people who are interested/working on bringing CoastSnap to Santa Cruz. 😊
View what the UCSC team did so far for the pilot CoastSnap program in our progress report.
Repository Structure
Create New Components
Add New Locations
Add New Section to About Page
Add New Team Member to Homepage
Add New Section/Link to Footer
Get a Local Copy of Repository to Modify Website
Save Your Website Changes to GitHub
Publish Your Website Changes on UCSC Server
Learn More
The following files make up the main content of the website:
src/pagesfolder: pages of the website.Home.js: homepage of website, which is the first page that any user sees when visiting the website.- Many examples of placing components in the homepage are found here.
- No required properties.
- Example from
App.js:<Home />
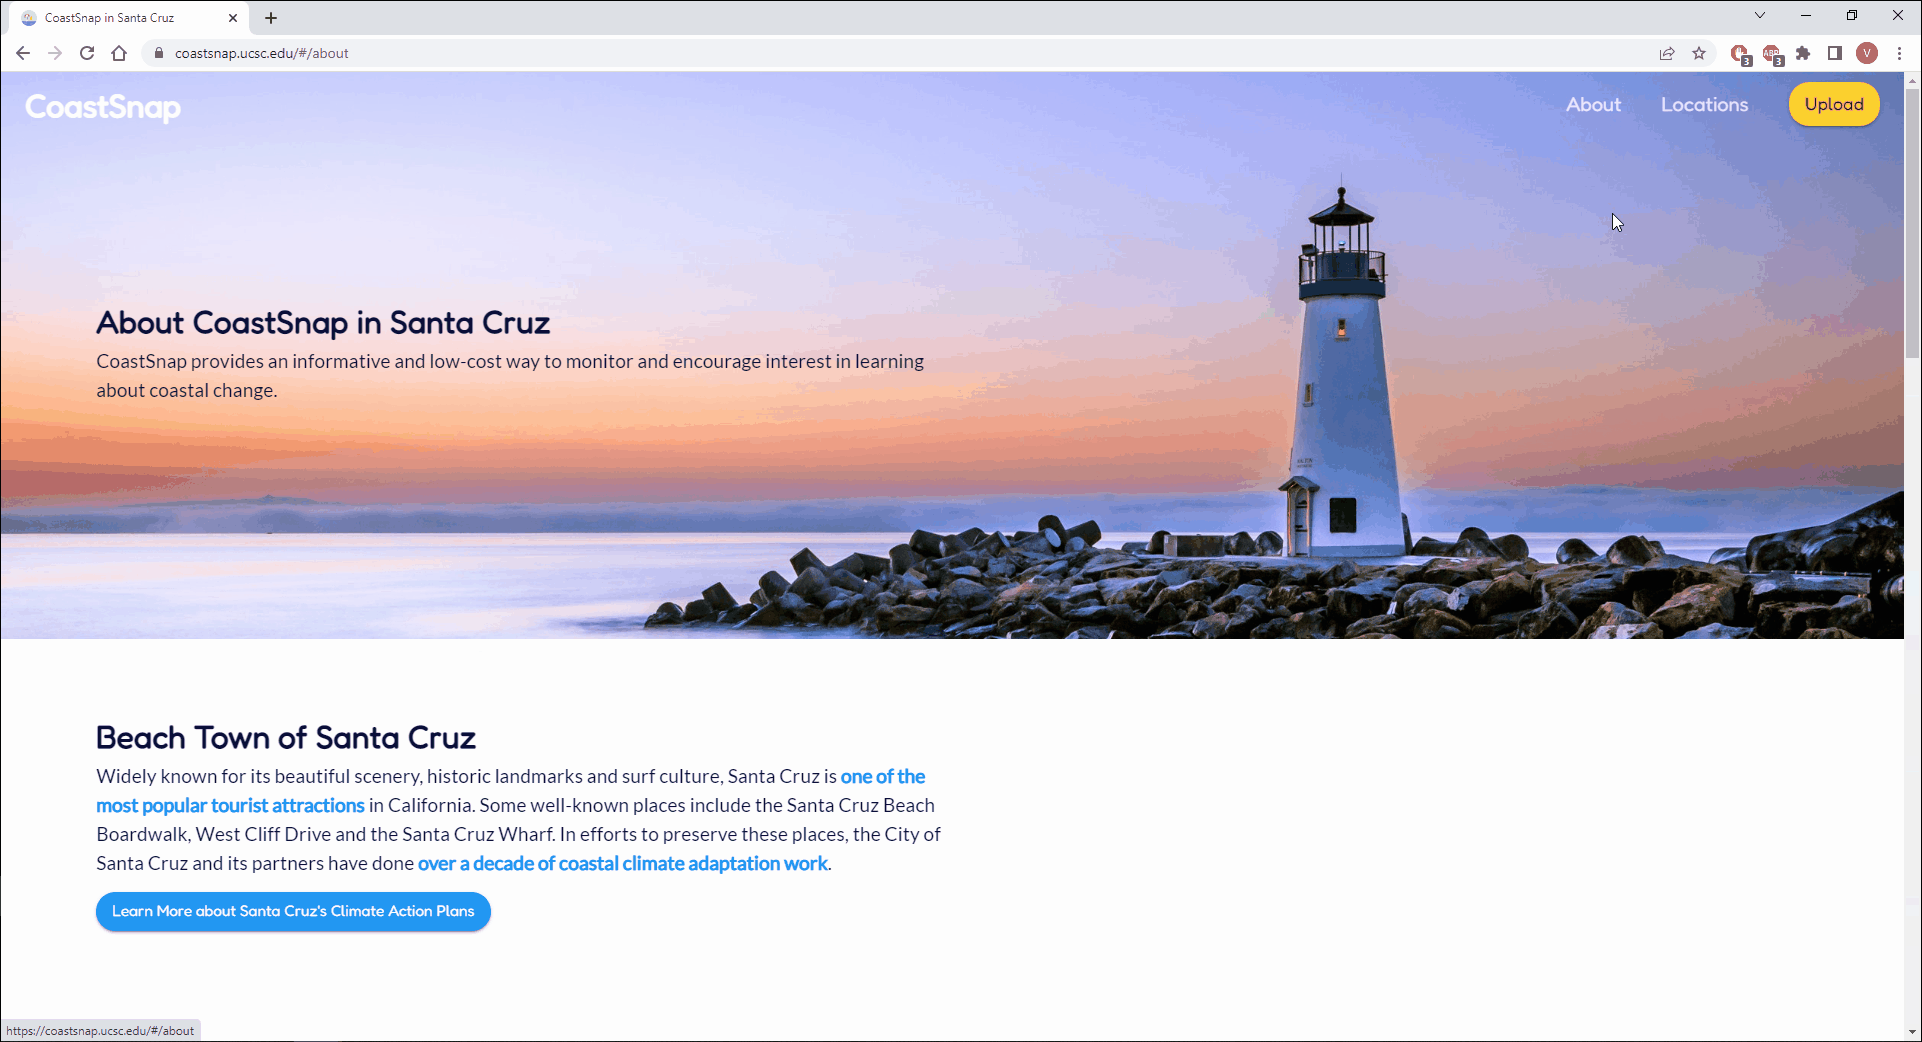
About.js: page that tells user more about the implementation of CoastSnap in Santa Cruz.- No required properties.
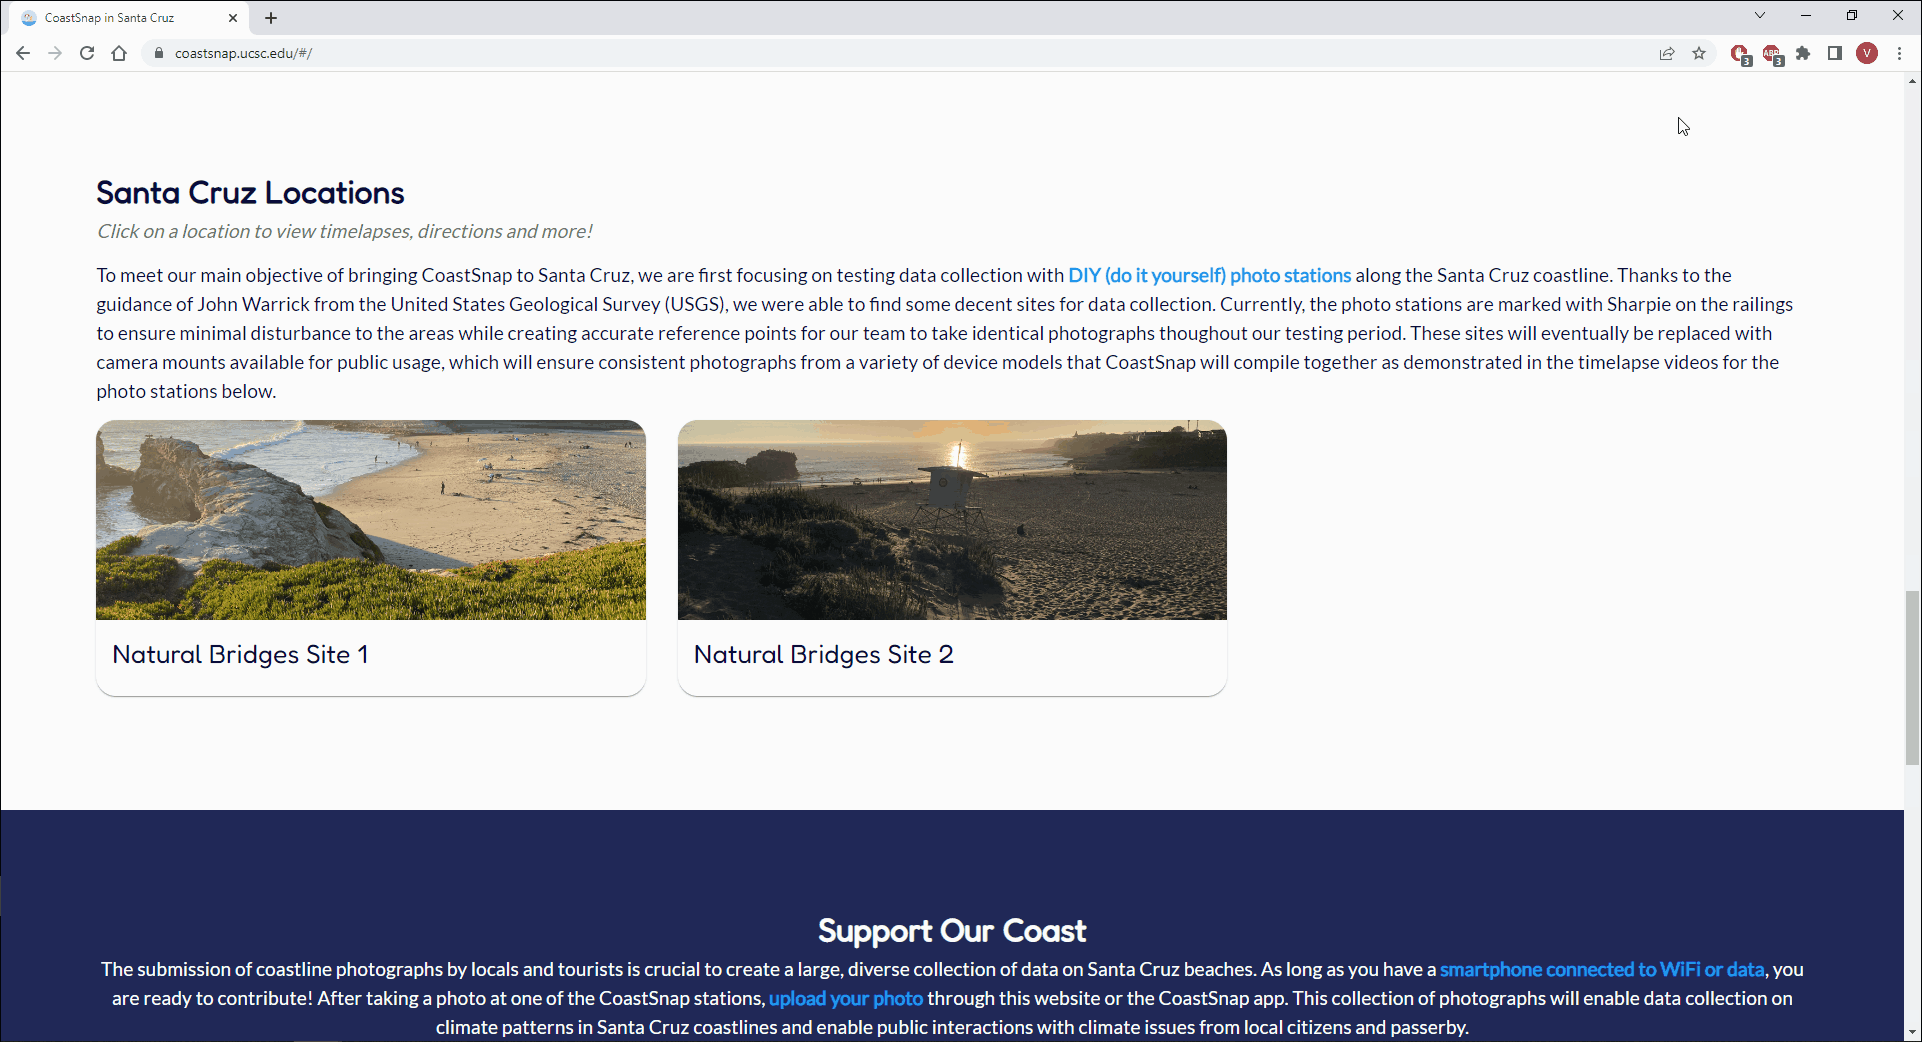
LocationInfo.js: page with more information about each Santa Cruz photo location.- No required properties.
- Uses the URL parameter to figure out which location to display information about.
- Gets location information from
locations.json - Example from
App.js:<LocationInfo />
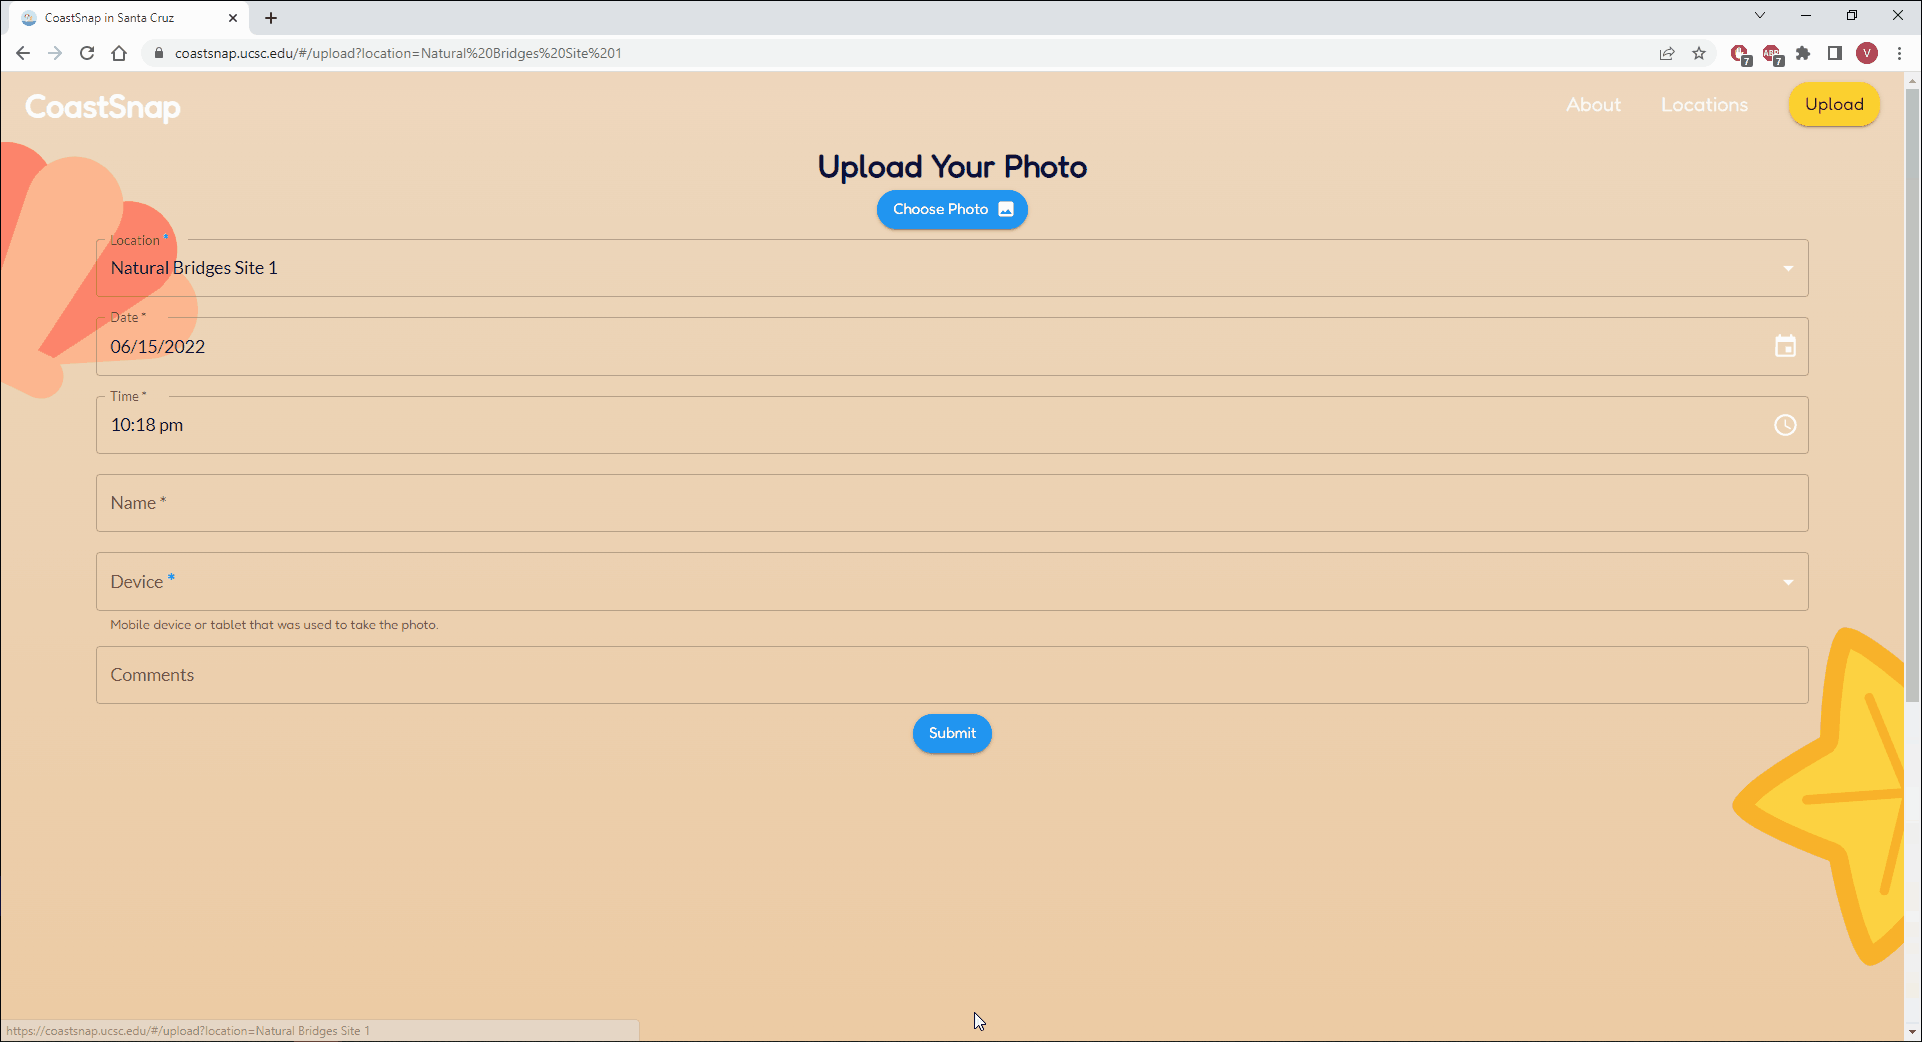
UploadPicForm.js: form that user fills out to upload their pictures through this website.- User must provide an image and fill out the Location, Name and Device fields.
- No required properties.
- Example from
App.js:<UploadPicForm />
src/componentsfolder: reusable components of the website.CoastSnapFeatures.js: list three main features of CoastSnap on the homepage.- No required properties.
- Example from
Home.js:<CoastSnapFeatures />
CoastSnapInSantaCruz.js: sections that explain why we are bringing CoastSnap to Santa Cruz.- If you want to modify or add a section, make sure to edit
coastsnapInSantaCruz.jsonin thesrc/datafolder.- View detailed instructions here.
- No required properties.
- Example from
About.js:<CoastSnapInSantaCruz />
- If you want to modify or add a section, make sure to edit
EnlargeImagePopup.js: enlarges a clicked image to fill up the full width of the user's device.- Required properties:
img: source of image to display.description: title of popup that displays the enlarged image.close: function used to close the popup of the enlarged image.
- Example from
LocationInfo.js:<EnlargeImagePopup img={enlargedImg} description={enlargedImgDescription} close={handleClose} />
- Required properties:
Footer.js: footer containing links to resources provided by the City of Santa Cruz and CoastSnap.- No required properties.
- Example from
App.js:<Footer className="footer" />
- Make sure to add
footerclass to place the footer at bottom of website.
- Make sure to add
LocationCard.js: "card" in homepage for each location.- Navigates user to location's own page when clicked.
- Required property:
location: name of location that the card is for.
- Example from
Home.js:<LocationCard location={loc} />
LocationDirections.js: directions to reach the location's picture spot.- Required properties:
loc: name of the location to display directions for.enlarge: function used to set the image and description of the popup that enlarges a clicked image.
- Example from
LocationInfo.js:<LocationDirections loc={location} enlarge={handleEnlarge} />
- Required properties:
MethodsForUploadingPics.js: details the different ways to upload coastline pictures (through the CoastSnap app or this website).- No required properties.
- Example from
Home.js:<MethodsForUploadingPics />
NavBar.js: navigation bar at the top of all pages on this website.- "CoastSnap" leads back to the homepage.
- "Upload" leads to the Upload Form for uploading pictures through this website.
- "About" leads to the About section on the homepage.
- "Locations" leads to the Locations section on the homepage.
- No required properties.
- Example from
App.js:<Navbar scrollTo={setScrollElement} />
Slideshow.js: slideshow of images displayed on the homepage.- Images are from
src/images/slideshow.- Can change images in slideshow by simply changing the images in the
slideshowfolder.
- Can change images in slideshow by simply changing the images in the
- No required properties.
- Example from
Home.js:<Slideshow />
- Images are from
TeamMembers.js: list of UCSC team members involved with CoastSnap.- No required properties.
- Add or modify team member information by following these instructions.
- Example from
Home.js:<TeamMembers />
UploadConfirmationPopup.js: popup that appears after the user submits their picture and information in the Upload Form.- Either displays a progress bar or an error message (if the upload was unsuccessful).
- No required properties.
- Example from
App.js:<UploadConfirmationPopup />
src/datafolder: text used as content in the website (open the JSON files in this folder to see more examples).coastsnapInSantaCruz.json: information for each section in theCoastSnapInSantaCruzcomponent.title: topic of section.text: more information related to the topic.button: optional property that can be added if you have a link that leads to even more information about the topic.- link will appear as a button underneath the
text - first item in list is the link
- second item is the text that appears on the button
- link will appear as a button underneath the
image: alternate text for the section's image in case it can't be displayed.
devices.json: options provided for the Devices field in the Upload Form.devices: list of devices that the user might have used to take a picture of the coastline.deviceNotListed: last option with the message to input the name of the user's device if it was not listed.
teamMembers.json: list of CoastSnap team members from UCSC.name: first and last name of the team member.- One of the two following properties must be included:
image: property for the name of the team member's image, if provided.initials: initials of the team member, if the image is not provided.
role: role(s) that the team member has for the project.- Examples:
"Web Developer"for one role,"Web Developer & UX/UI Designer"for two roles
- Examples:
education: team member's type of degree, major, and graduation year. Examples:"B.S. in Marine Biology, 2022","B.S. in Computer Science, 2022"link: optional link to the team member's LinkedIn profile or personal website for people to learn more about them.- Omit this from the team member's info if they don't have or want to provide a link.
- If provided, clicking on the team member will open up the link in a new browser tab.
footer.json: links to resources from the City of Santa Cruz and CoastSnap.- Example:
{ "Learn More": { "About Us": "#/about", "Resilient Coast Santa Cruz": "https://www.cityofsantacruz.com/government/city-departments/city-manager/climate-action-program/resilient-coast-santa-cruz", "Climate Educational Resources": "https://www.cityofsantacruz.com/government/city-departments/city-manager/climate-action-program/climate-educational-resources" } }- Footer Section Name: Learn More
- Footer Link Names Under "Learn More" : About Us, Resilient Coast Santa Cruz, Climate Educational Resources
- Example:
locations.json: information about each Santa Cruz location, which is displayed in their respective pages.namedescription: what makes the location special (i.e. reasons for chosing this location as a photo station).imagetimelapseVids: list of Youtube links to completed timelapse reels.- Share > Embed > Copy the provided link in the snippet of code
- Example: copy the
srcvalue from the following code<iframe width="560" height="315" src="https://www.youtube.com/embed/akhXr-6nG5g" title="YouTube video player" frameborder="0" allow="accelerometer; autoplay; clipboard-write; encrypted-media; gyroscope; picture-in-picture" allowfullscreen></iframe>
googleMapsLink: link that navigates user directly to Google Maps.- Share > Send a link > Copy link
- Example: https://goo.gl/maps/wgnan6X8yECkpb4C8
mapEmbedLink: link provided by Google Maps to embed an interactive map of the location.- Click on Satellite view of the location
- Share > Embed a map > Copy the provided link in the snippet of code
- Example: copy the
srcvalue from the following code<iframe src="https://www.google.com/maps/embed?pb=!1m18!1m12!1m3!1d3188.525689468934!2d-122.05888308470588!3d36.94949997991806!2m3!1f0!2f0!3f0!3m2!1i1024!2i768!4f13.1!3m3!1m2!1s0!2zMzbCsDU2JzU4LjIiTiAxMjLCsDAzJzI0LjEiVw!5e0!3m2!1sen!2sus!4v1648071468616!5m2!1sen!2sus" width="600" height="450" style="border:0;" allowfullscreen="" loading="lazy"></iframe>
src/imagesfolder: images used in the website.- Make sure the name of the location folders match the location's
nameproperty inlocations.json. About: folder containing images shown on the about page.Homepage: folder containing images shown on the homepage.Homepage Slideshow: folder containing images shown in the homepage's slideshow.- Images will appear in the order that you named each image.
CoastSnap in Santa Cruz: folder containing illustrations for each subsection in theCoastSnapInSantaCruzcomponent.- Name illustrations in the numerical order that they should be displayed.
- Example:
1.svgis used for the first section of the component.
- Example:
mobile: folder containing mobile versions of the illustrations.- File name should correspond to the desktop version's name.
- Name illustrations in the numerical order that they should be displayed.
Location Info: folder containing illustrations for theLocationInfopages.UCSC Team: folder containing images for theTeamMemberscomponent on the homepage.- Images should be square-shaped for the sizing to match other team member's images.
- File name should correspond to the first and last name of the team member (with no spaces in between).
Upload: folder containing illustrations for theUploadPicFormpage.Footer: folder containing illustrations used for theFootercomponent.README: folder containing images and gifs used inREADME.md.
- Make sure the name of the location folders match the location's
App.css: all CSS styling used for the website.classNamevalue of any element would be customly styled if it matched a selector in this file- examples:
.centeredContent: selector for elements with a property ofclassName="centeredContent"#uploadedImg: selector for elements with a property ofid="uploadedImg"h1: selector for elements with a<h1>tag
App.js: contains all possible routes for the website.ThemeProvideris used to override default Material UI (MUI) styling.WebsiteContextprovides the following for any component or page to use:mobile: boolean (true or false value) that is used to check if the user's browser size is similar to mobile devices.- MUI's default
sm/small breakpoint = 600 pixels
- MUI's default
tablet: boolean (true or false value) that is used to check if the user's browser size is similar to tablets.- MUI's default
md/medium breakpoint = 900 pixels
- MUI's default
scrollElement: element to scroll to when the homepage is loaded.setScrollElement: sets the new element to scroll to.confirmUpload: boolean (true or false value) that determines whether or not to show the image upload confirmation popup.setConfirmUpload: function used to open and close the popup for confirming an image upload.uploadProgess: percentage of image that was uploaded; -1 if upload was unsuccessful.setUploadProgress: function used to set the image upload progress.
To create a new component, add a new ComponentName.js file in src/components and copy the following:
import React from "react";

const ComponentName = () => {
  return (
    <div>
      <!-- Place component content here! -->
    </div>
  );
};

export default ComponentName;
Replace ComponentName in the filename and code with a name that reflects the new component that you want to create.
- Add the required location information in
locations.json.- Example:
{ "name": "Natural Bridges Site 1", "description": "This station has good exposure, solid reliable ground points, is interesting to look at on an image reel / time lapse and very car accessible.", "image": "NB1_21_01_27_16_48_Iphone11_IB.jpeg", "timelapseVids": ["https://www.youtube.com/embed/akhXr-6nG5g"], "googleMapsLink": "https://goo.gl/maps/rzwiDPqygU3G2vQz8", "mapEmbedLink": "https://www.google.com/maps/embed?pb=!1m18!1m12!1m3!1d1005.7556443852632!2d-122.05724697064817!3d36.949501299999994!2m3!1f0!2f0!3f0!3m2!1i1024!2i768!4f13.1!3m3!1m2!1s0x0%3A0x7bfc93095caca331!2zMzbCsDU2JzU4LjIiTiAxMjLCsDAzJzI0LjEiVw!5e1!3m2!1sen!2sus!4v1650736198124!5m2!1sen!2sus" } - Use a comma to separate information about each location.
- Example:
- Create a new folder in
src/imagesand name it with the location'snamevalue fromlocations.json. Then place all images for this new location in the folder. - Add directions for the newly added location in
LocationDirection.js:- Add the following into
LocationDirection.js:{loc === "Location Name" && <div> <!-- Place directions and images here! --> </div> } - Replace
Location Namewith the name of the new location (must match the name inlocation.json). - Make sure to import any used images at the top of
LocationDirection.js.- Example:
import NB1Lookout1 from "../images/Natural Bridges Site 1/NB1Pic1.jpg";
- Example:
- Add the following into
- Each section requires an illustration/image. Rename the new section's illustration/image file with a number.
- This number will be used to determine where the new illustration/image will be placed relative to other existing illustrations/images.
- Place the renamed illustration file in the
src/images/CoastSnap in Santa Cruzfolder. - The mobile layout of the About page is different than the desktop layout. If you have a specific illustration/image for the mobile layout, then repeat step 1 by renaming that illustration/image with the same number and placing it into the
src/images/CoastSnap in Santa Cruz/mobilefolder. Otherwise, add a copy of the desktop illustration/image into thesrc/images/CoastSnap in Santa Cruz/mobilefolder. - Open the
coastsnapInSantaCruz.jsonfile located in thesrc/datafolder. - Paste and modify the following template in order to add text for the new section in the
CoastSnapInSantaCruzcomponent.- Make sure to paste the template in the order that you would like the new section to appear on the About page.
- Example: If you renamed the new section's illustration to
5and there are 4 existing sections, then place the text template at the end of the list incoastsnapInSantaCruz.json. There should be 4 of these structured templates above our new template.
- Example: If you renamed the new section's illustration to
{ "title": "Section Title", "text": "This is text that talks about the section title in more depth. You can bring attention to certain keywords by placing <span className=\"blueText\">and some important text in between these span tags</span> to bold the text with a <span className=\"blueText\">blue color</span>.", "button": ["https://www.websitelink.com/", "Text on Button that Leads to the Specified Website When Clicked"], "image": "Alternative Text that Appears When the Image Cannot Load" },- The
buttonandimageproperties above are optional in case you don't have any resources/links to add.
- Make sure to paste the template in the order that you would like the new section to appear on the About page.
- Open the
teamMembers.jsonfile located in thesrc/datafolder. - Paste the following template after the last teammate's info.
- If you have an image of the new team member,
- crop the image into a square shape for the best results
- rename the image to the new team member's first and last name (without spaces in between)
- place the image in the
src/images/UCSC Teamfolder - replace
FirstLast.jpgwith the name of the image and the image format (e.g..jpg,.png):
{ "name": "First Last", "image": "FirstLast.jpg", "role": "New Team Member's Role(s)", "education": "Type of Degree in Major, Graduation Year" } - If you don't have an image of the new team member, then provide their initials instead:
{ "name": "First Last", "initials": "FL", "role": "New Team Member's Role(s)", "education": "Type of Degree in Major, Graduation Year" } - Look at other team members' info for examples.
- Note: Remember to add a comma
,after the last teammate's info to separate the new teammate's info from theirs.
- If you have an image of the new team member,
- If the new team member has a LinkedIn profile or personal website that they would like to share, then add the following property and replace the placeholder link with their preferred link:
"link": "https://www.linkedin.com/in/username"
- Note: Remember to add a comma
,after the new teammate'seducationproperty to separate it from thelinkproperty.
- Note: Remember to add a comma
- To add a new section to the footer, copy the following and add it to the object in
data/footer.json:"New Section Name": { <!-- Place section links here. --> }
- To add a new link under a section, choose a section to add the link to and paste the following underneath the section:
"Link Name": "https://www.link.com"
- Replace the above with actual link values.
- Example (to create a new section and add two new links under it):
"New Section Name": {
  "Link Name 1": "https://www.link1.com",
  "Link Name 2": "https://www.link2.com"
}
- Open a terminal and navigate to a place where you want to store the CoastSnap repository.
- Run in the terminal:
git clone https://github.com/venuswku/CoastSnap.git. - Email [email protected] or [email protected] to get the
.envfile, which contains the environment variables needed to access the Google Drive API. Save the.envfile at the root of the repository (i.e. same level as theApp.jsandpackage.jsonfiles). - Run
npm cito locally install all package dependencies found inpackage-lock.json. - Run the website in development mode with
npm start. Usectrl + Corcmd + Cto stop it from running.
Once the repository is copied to your local device, you just need to repeat step 5 to see your changes.
- Open a terminal and navigate to the CoastSnap repository (e.g.
cd coastsnap). - Run
git add .to stage or mark the files that you want to save changes for.- Note:
.stages all files that you have made a change on. You can also just replace.with a list of file names, separated with a space, to stage specific files (e.g.git add Home.js LocationInfo.js).
- Note:
- Run
git commit -m "Commit message"and replaceCommit messagewith a brief summary of the changes you made. - Run
git pushto push your changes for everyone to see on GitHub.
You need to deploy the website so that anyone who visits our CoastSnap website would see your changes.
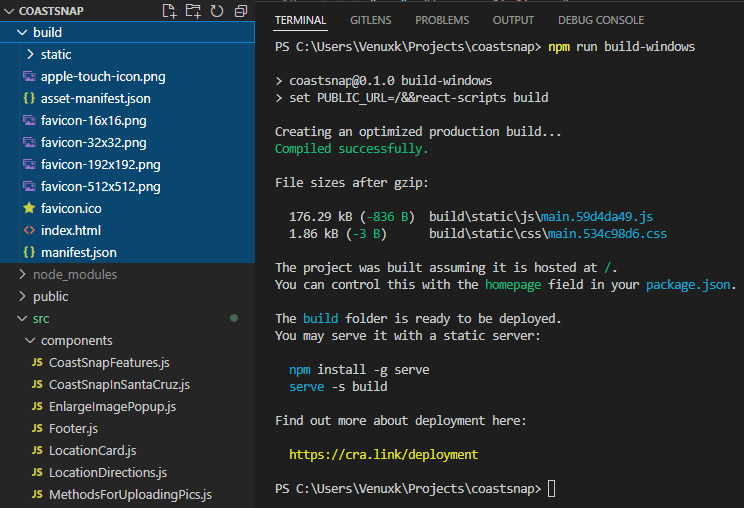
- Build a production version of the website based on your operating system.
- Open a terminal and navigate to the CoastSnap repository (e.g.
cd coastsnap). - If you have a Windows operating system, execute
npm run build-windowsin the terminal. - If you have a Mac operating system, execute
npm run build-macin the terminal. - New production files should be saved into a
buildfolder.
- Open a terminal and navigate to the CoastSnap repository (e.g.
- Deploy through UCSC's server by following IT's instructions.
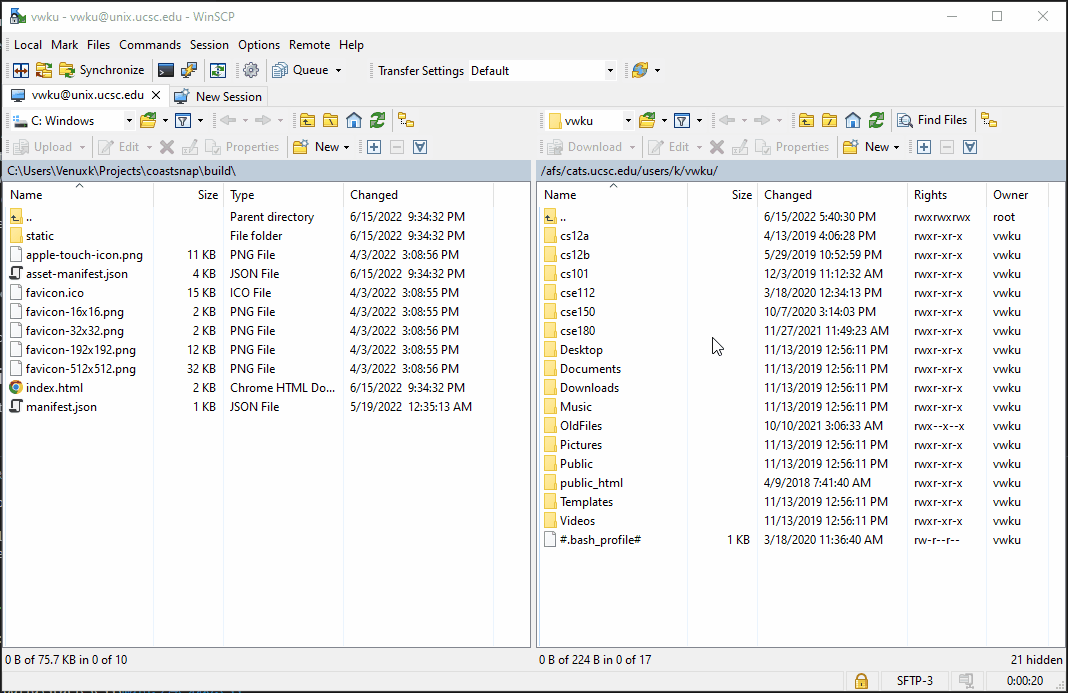
- Connect to the UCSC server with the SFTP software of your choice (e.g. FileZilla, WinSCP).
- Hostname: sftp.ic.ucsc.edu
- Username: Your UCSC Cruz ID
- Port Number: 22
- Authentication Method: Your UCSC Blue Password
- Open the directory where we'll store the website files:
/afs/cats.ucsc.edu/www/coastsnap/prod/public_html. - Copy website files from this directory's
buildfolder into the directory that we recently navigated to.- Overwrite previous files if they exist.
- Overwrite previous files if they exist.
- Connect to the UCSC server with the SFTP software of your choice (e.g. FileZilla, WinSCP).
- View deployed changes at https://coastsnap.ucsc.edu/.
This project was bootstrapped with Create React App.
You can learn more in the Create React App documentation.
To learn React, check out the React documentation.
In the project directory, you can run:
Runs the app in the development mode.
Open http://localhost:3000 to view it in your browser.
The page will reload when you make changes.
You may also see any lint errors in the console.
Launches the test runner in the interactive watch mode.
See the section about running tests for more information.
Note: this is a one-way operation. Once you eject, you can't go back!
If you aren't satisfied with the build tool and configuration choices, you can eject at any time. This command will remove the single build dependency from your project.
Instead, it will copy all the configuration files and the transitive dependencies (webpack, Babel, ESLint, etc) right into your project so you have full control over them. All of the commands except eject will still work, but they will point to the copied scripts so you can tweak them. At this point you're on your own.
You don't have to ever use eject. The curated feature set is suitable for small and middle deployments and you shouldn't feel obligated to use this feature. However we understand that this tool wouldn't be useful if you couldn't customize it when you are ready for it.
This section has moved here: https://facebook.github.io/create-react-app/docs/code-splitting
This section has moved here: https://facebook.github.io/create-react-app/docs/analyzing-the-bundle-size
This section has moved here: https://facebook.github.io/create-react-app/docs/making-a-progressive-web-app
This section has moved here: https://facebook.github.io/create-react-app/docs/advanced-configuration
This section has moved here: https://facebook.github.io/create-react-app/docs/deployment